If you’ve heard how useful Facebook can be but haven’t taken the plunge into the world of social media because of how confusing it seems….this blog is for you.
Now before I go into the actionable steps you should take TODAY on Facebook let me explain why you should do so ASAP.
Facebook is essentially experiencing its own golden age right now.
With the largest user base of any platform on the planet and what I would consider the most useful advertising medium available to all business owners, it’s a huge mistake to be absent from that scene.
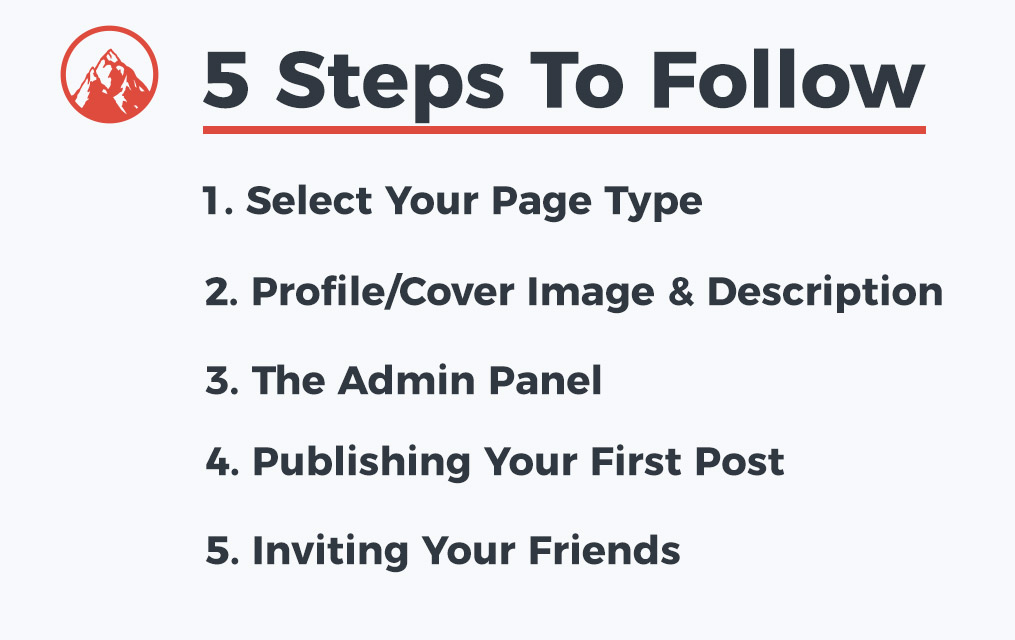
This blog is going to be filled with useful Facebook knowledge since that’s one of my most comfortable areas of experience. However, you have to start somewhere so before we get into complex ad strategies, posting to groups, scheduling content and much more. So we’re going to create our business page, invite your friends to like the page and prepare a boosted post.Those are the three things you should feel comfortable doing after you read this blog.
I would also like to encourage you to go and execute on all three of those things as soon as you’re done reading here.
Step 1 – Selecting Your Facebook Business Page Type
Now before you can use any of the amazing tools Facebook has to offer, you have to have your own Facebook business page.
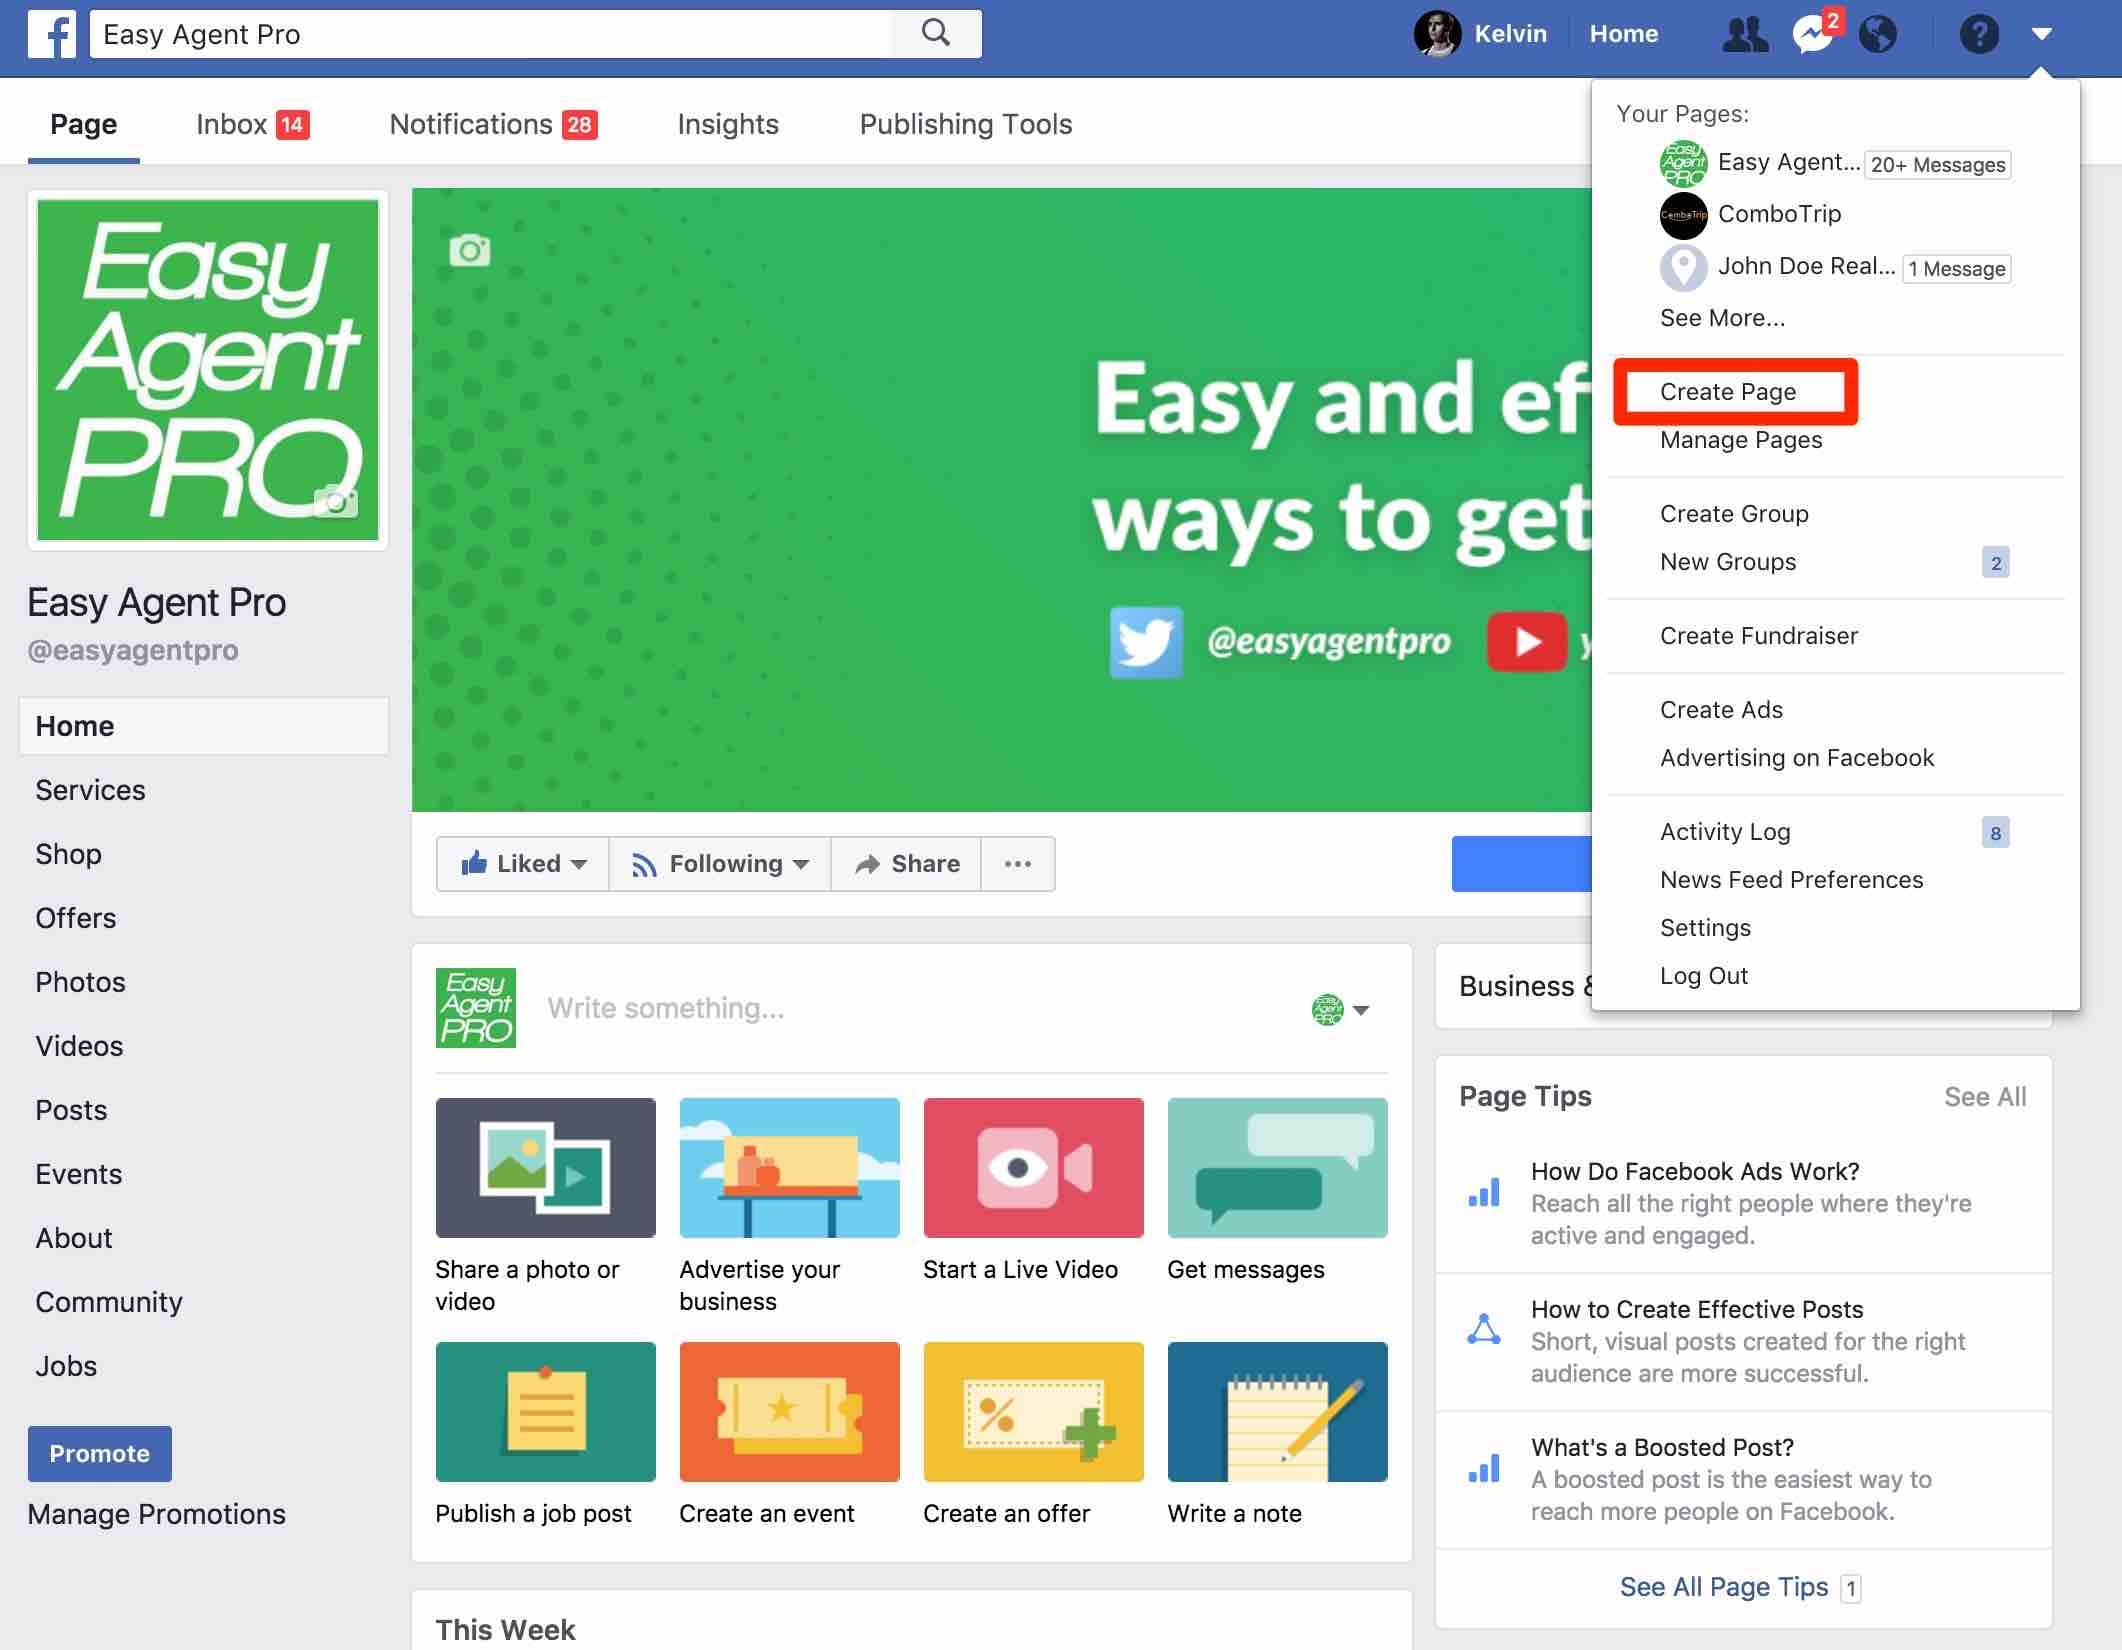
You start this setup process by selecting the drop-down arrow in the top left-hand corner of your screen.
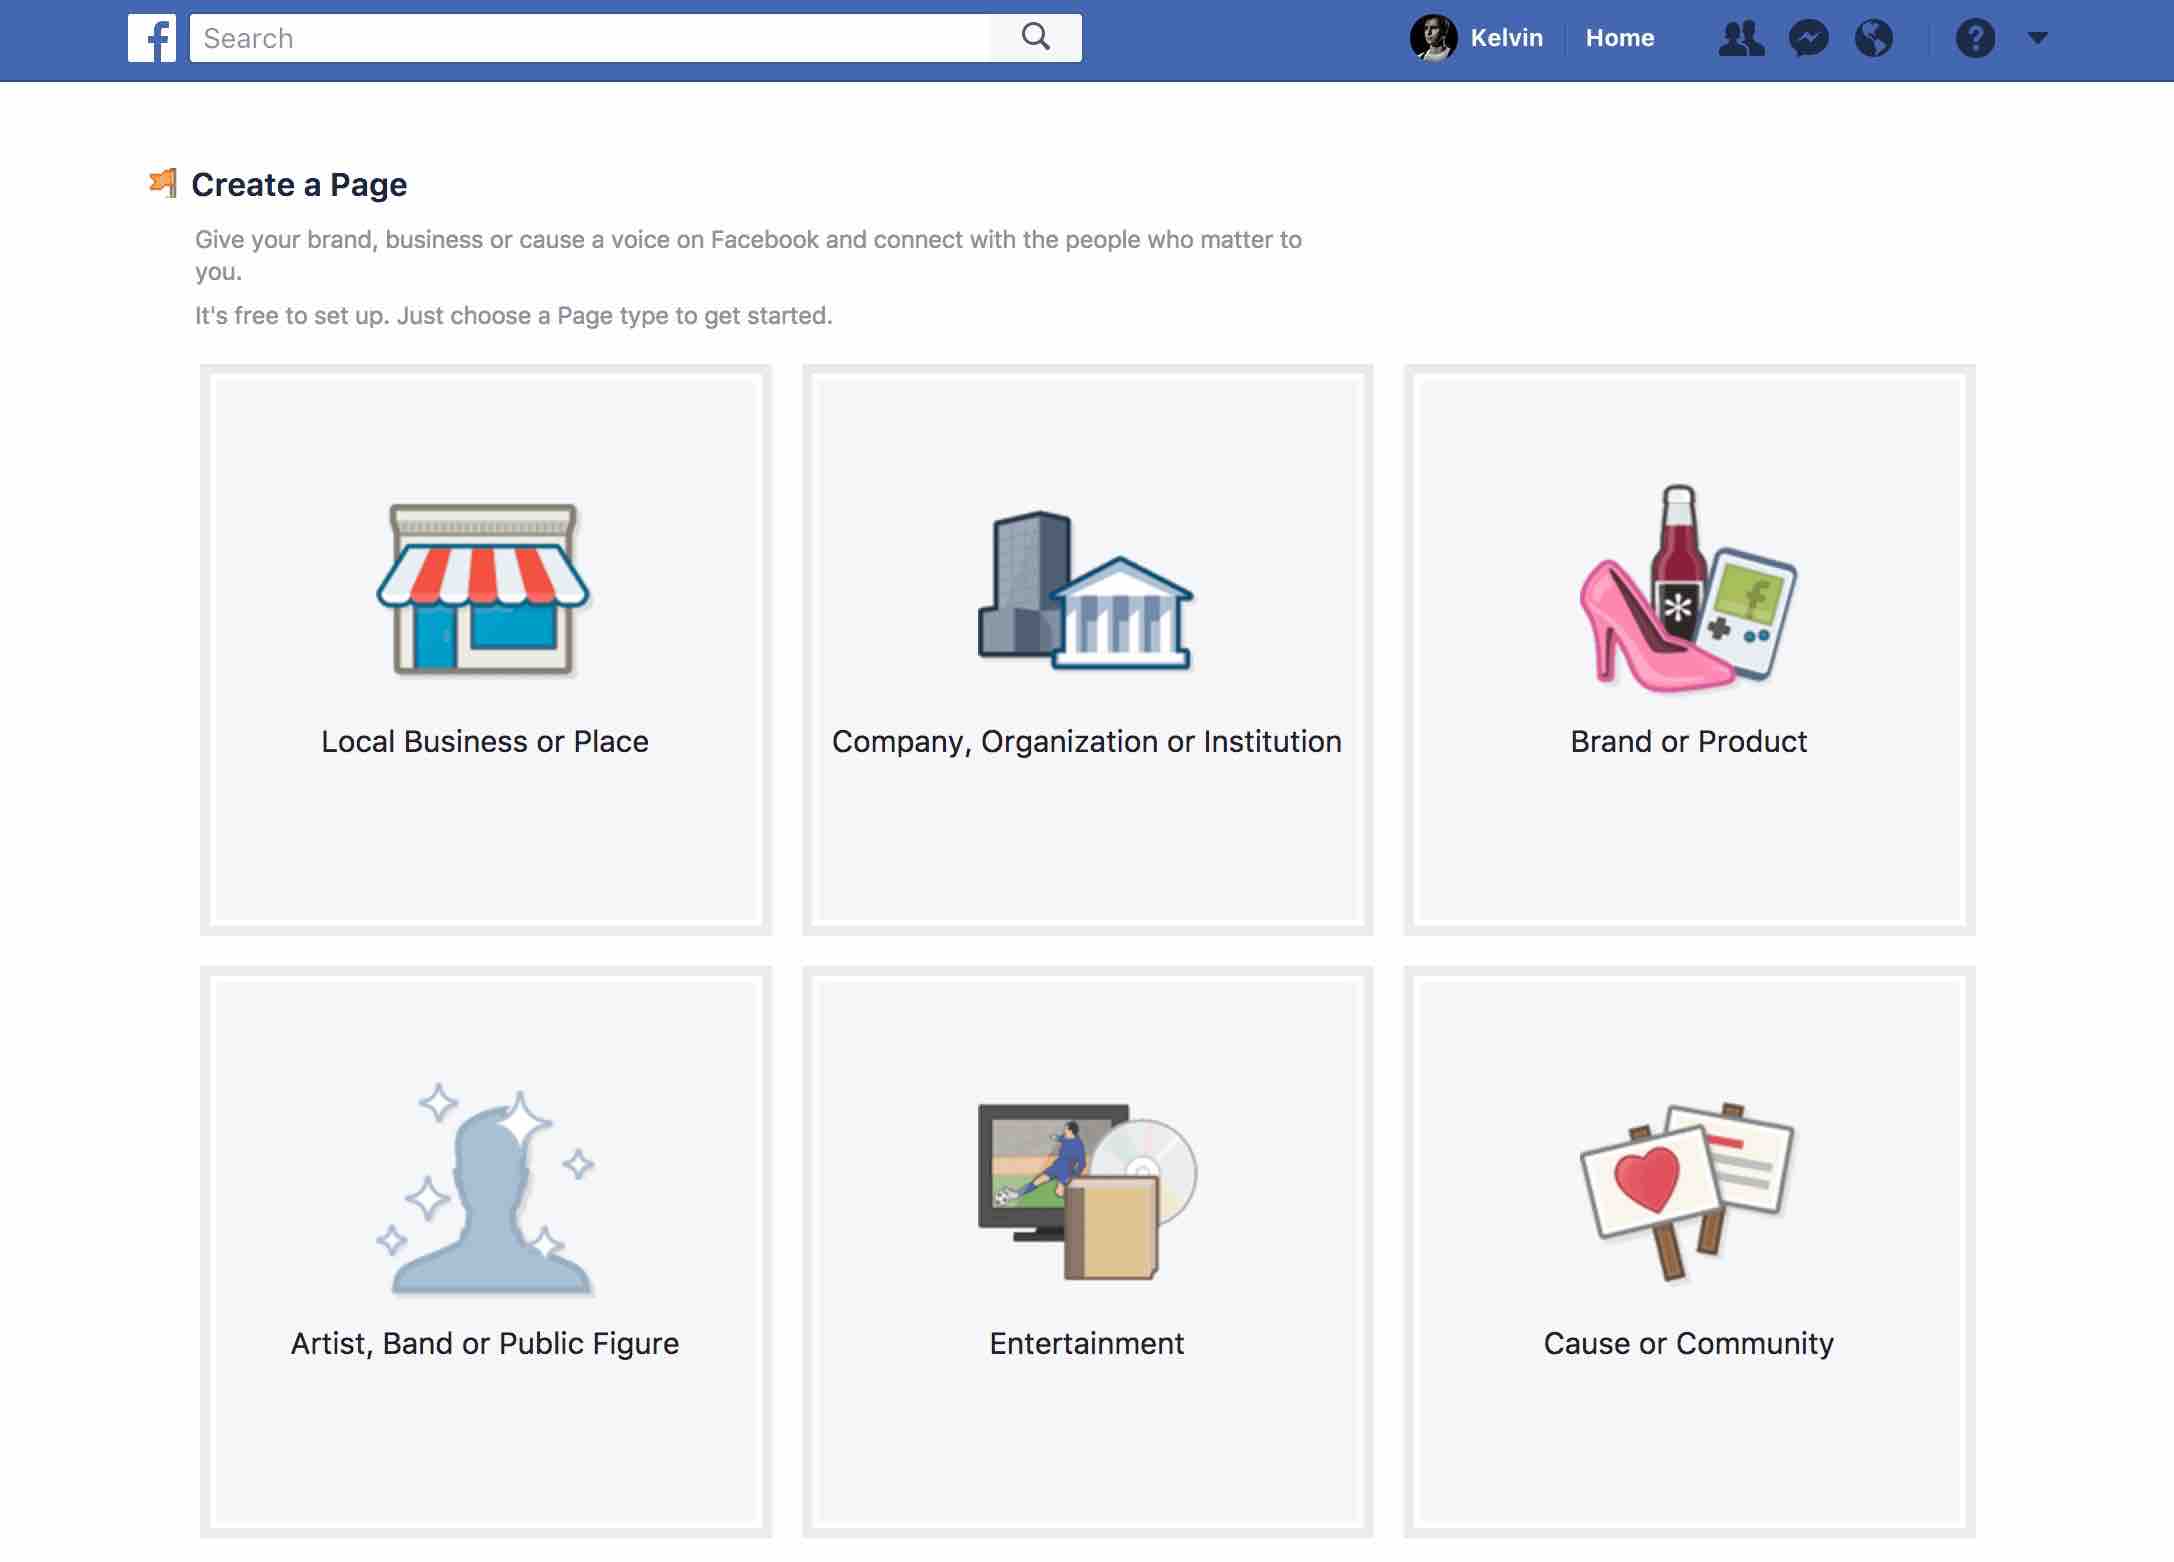
Next, you’ll be prompted with the page type panel, most client’s I’ve worked with I’ve setup on one of the top three options.
For my example, I’m going to choose “Company, Organization or institution”.
Step 2 – Profile/Cover Image & Description
Once you’ve selected your page ideally this would be the time to upload your logo and cover photo.
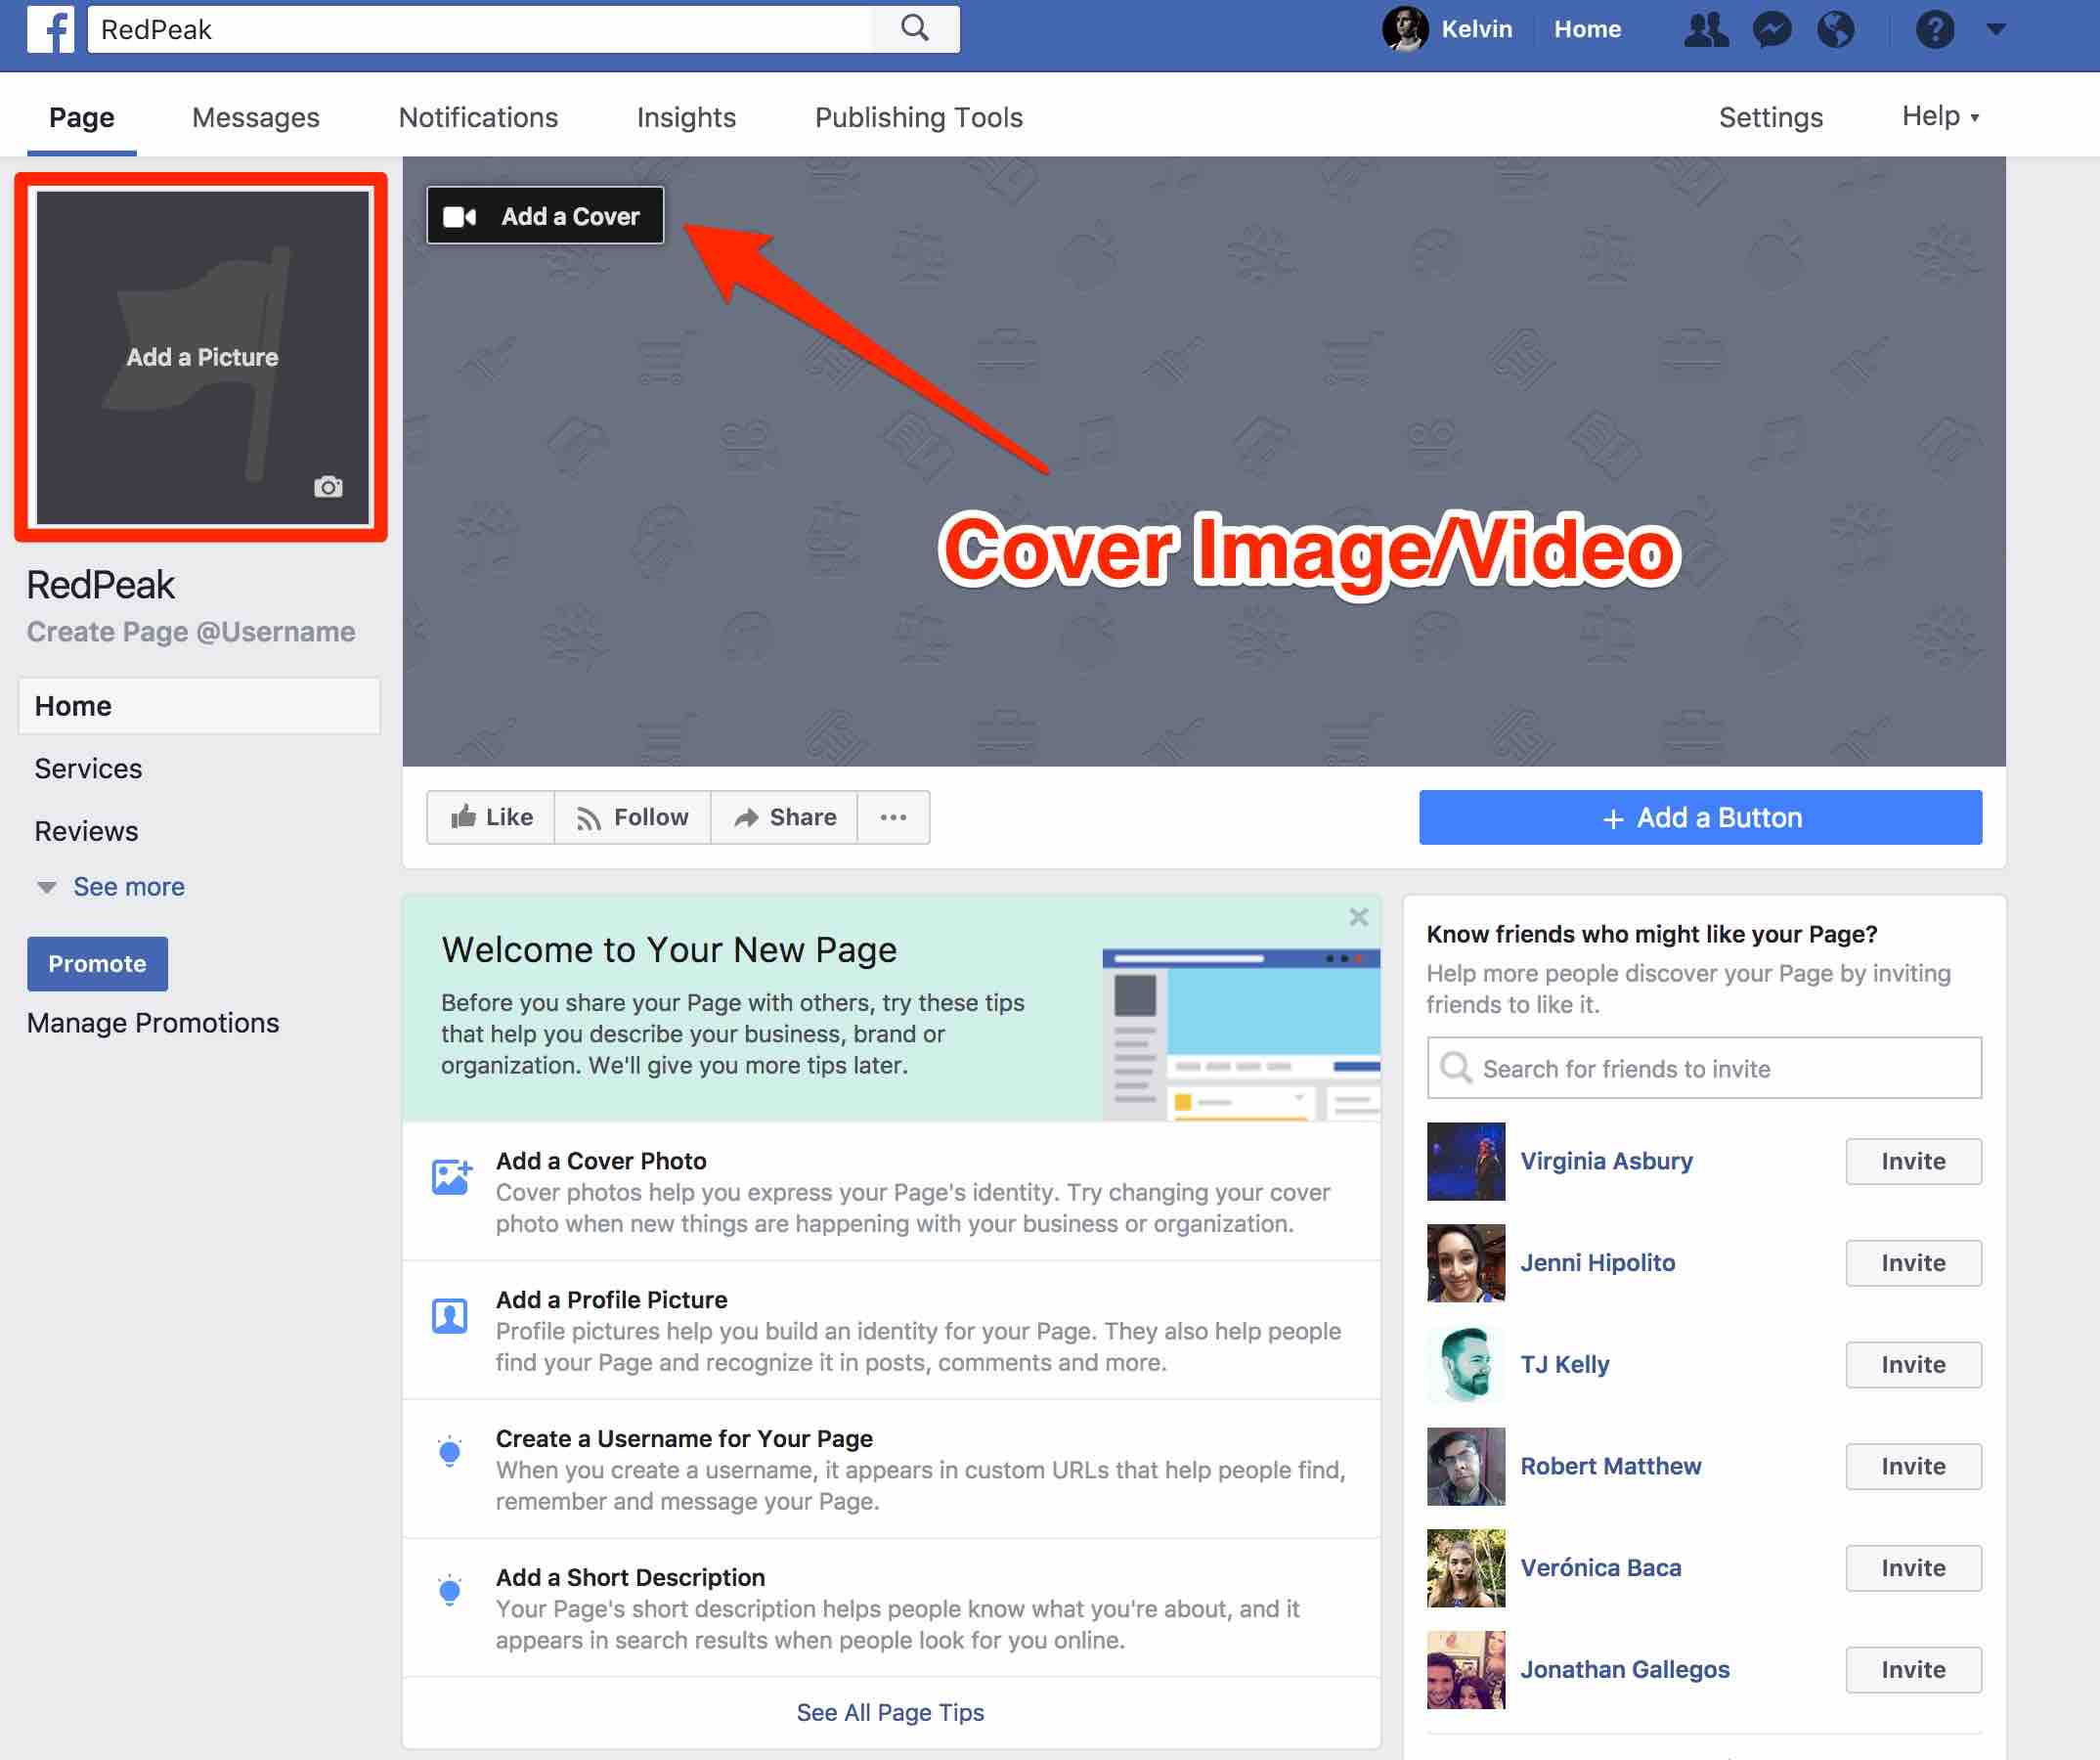
If you don’t have these graphics yet you can upload them at a later time. However, I would recommend that you add these graphics before you start inviting people to like the page and before you start posting content or launching ads. Once that’s all done you did it….you created your Facebook business page. As you can see on your screen Facebook is going to prompt you to fill out the additional information. Add your username, add a description of your business, reviews you name it.
Facebook About Section
This section should be no more than 2-3 sentences that establish exactly what your company does.
If you can’t explain your business easily in 2-3 sentences your model is too complex. Here’s What I put on my page

Granted one sentence is almost a run on but I explain exactly what RedPeak Media is and what we do here.
Here’s what my page looks like now
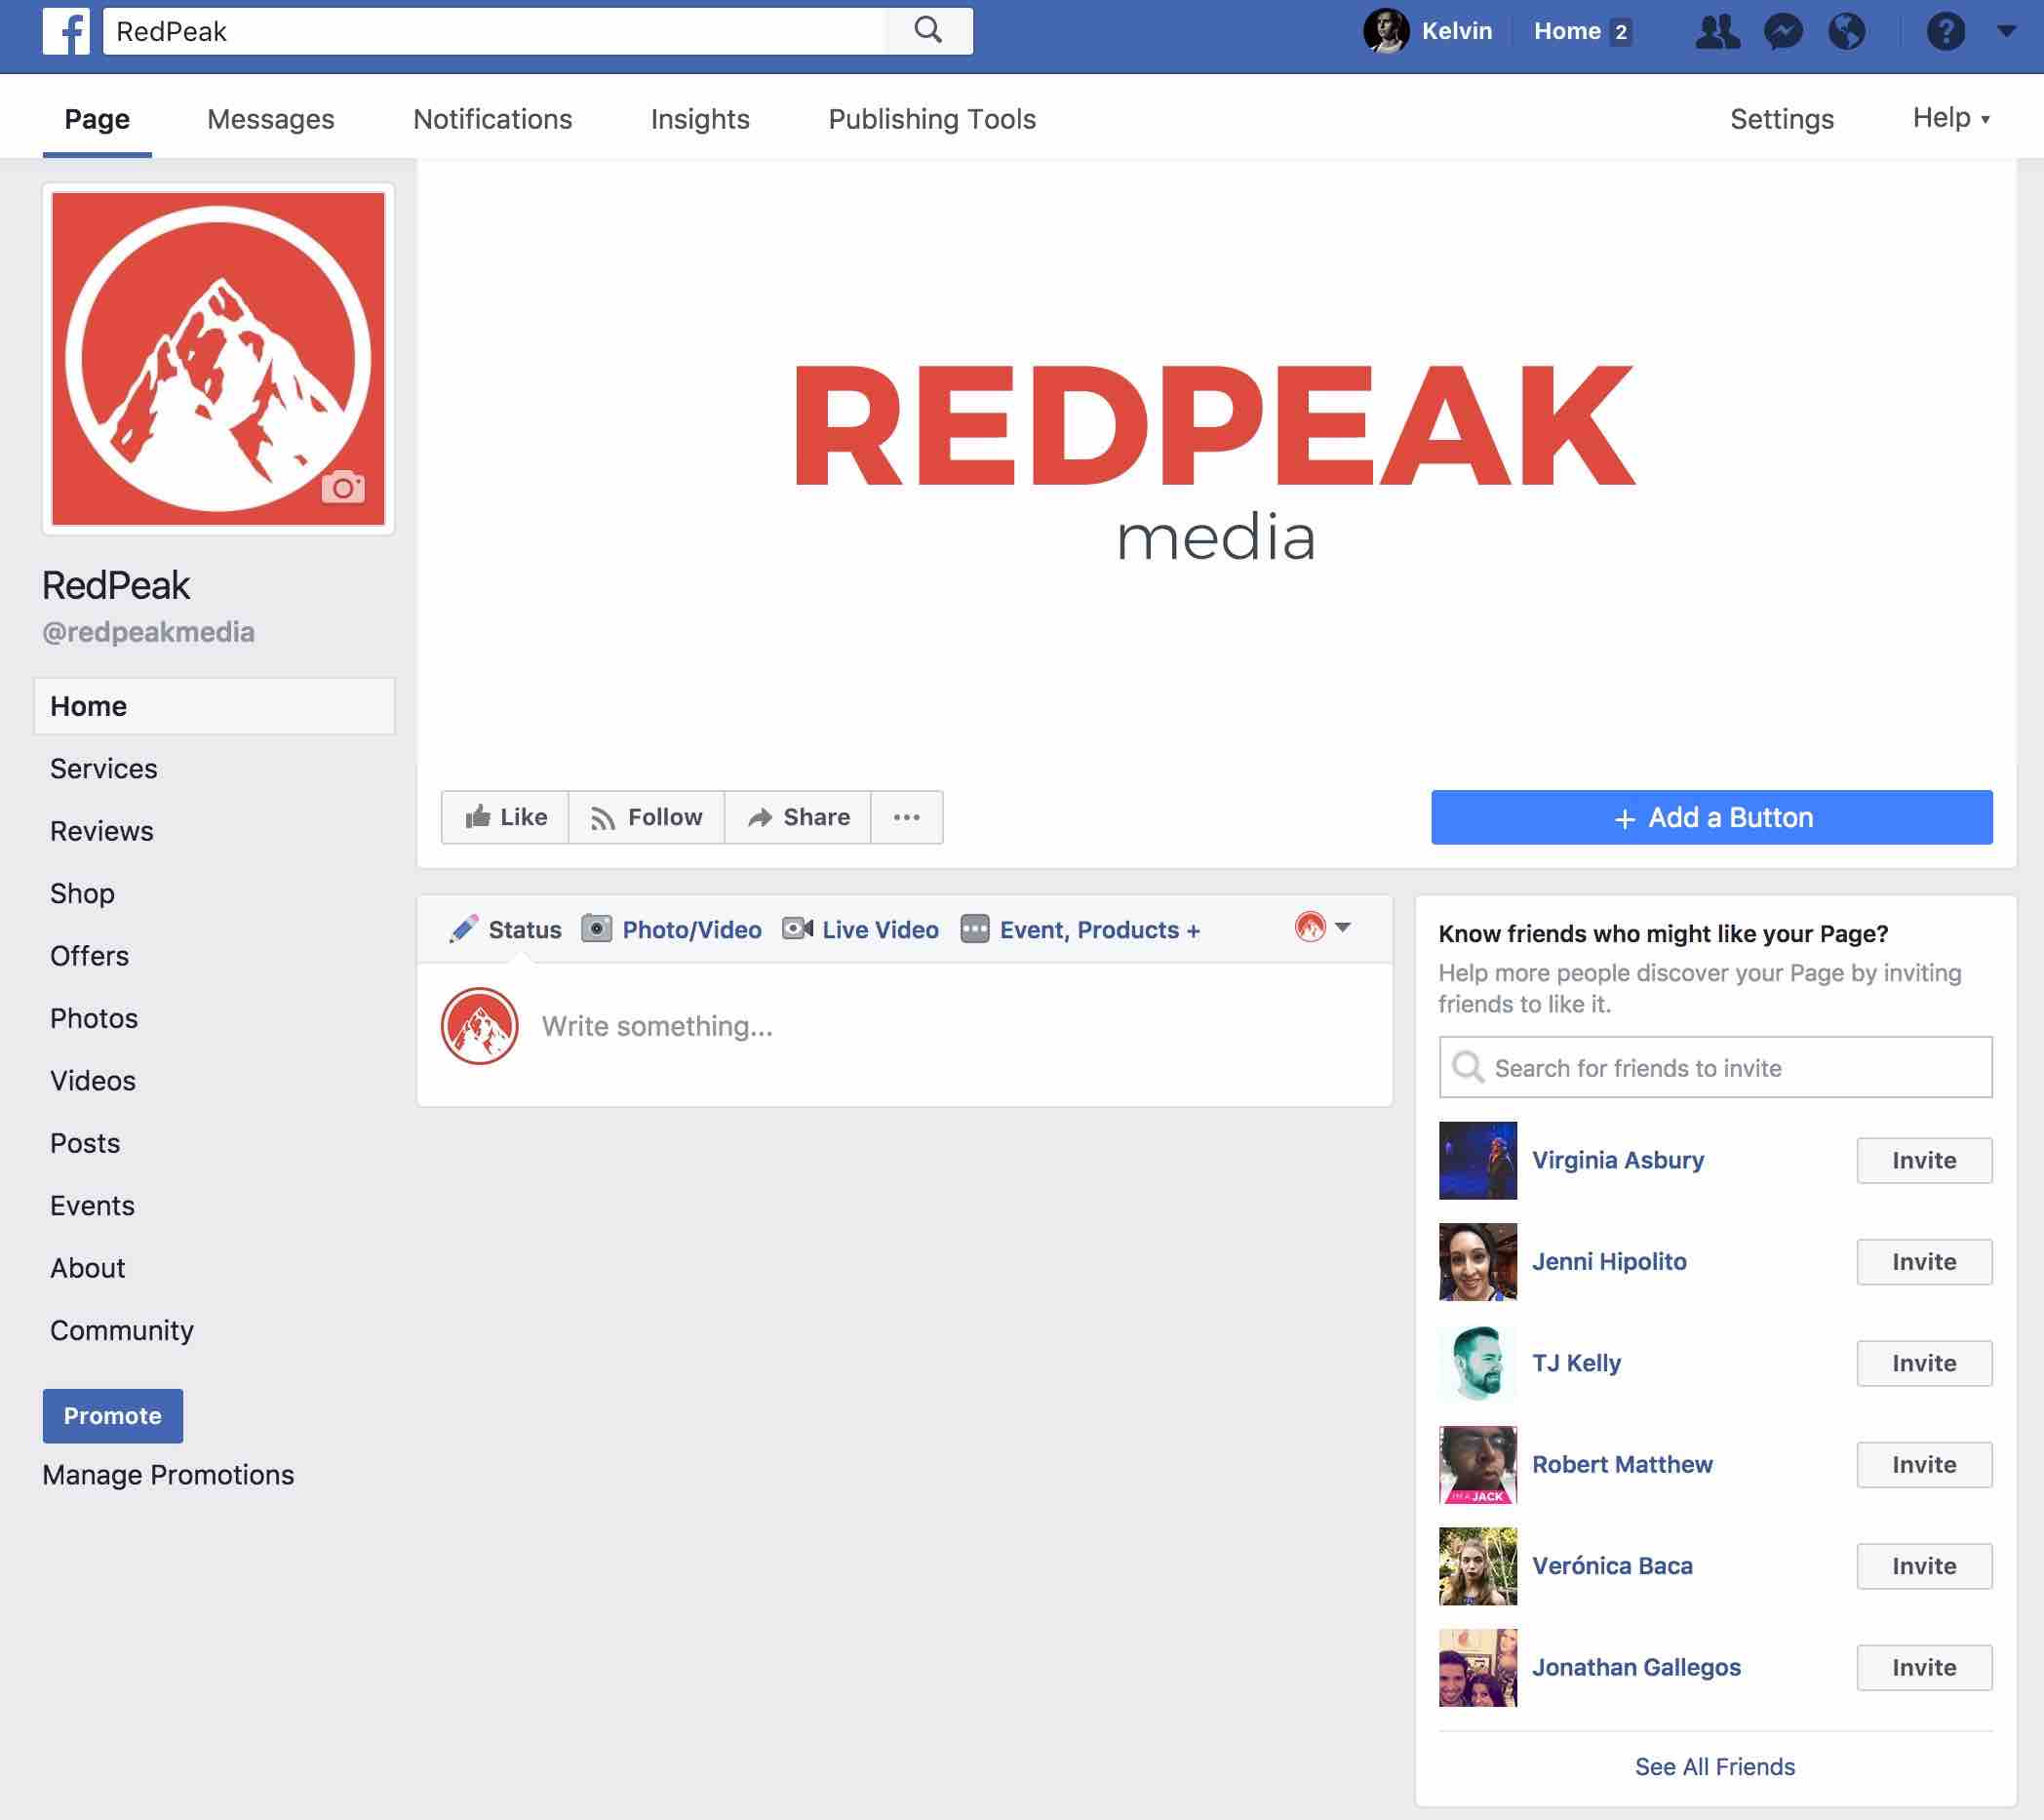
Step 3 – The Admin Panel
Above your profile/cover image, you’ll also see 5 different tabs. It’s very helpful just to get acquainted with each of these tabs before you have any actual data to inspect. You can see we’re currently on “Page” and just to the right of that you see “Inbox”.

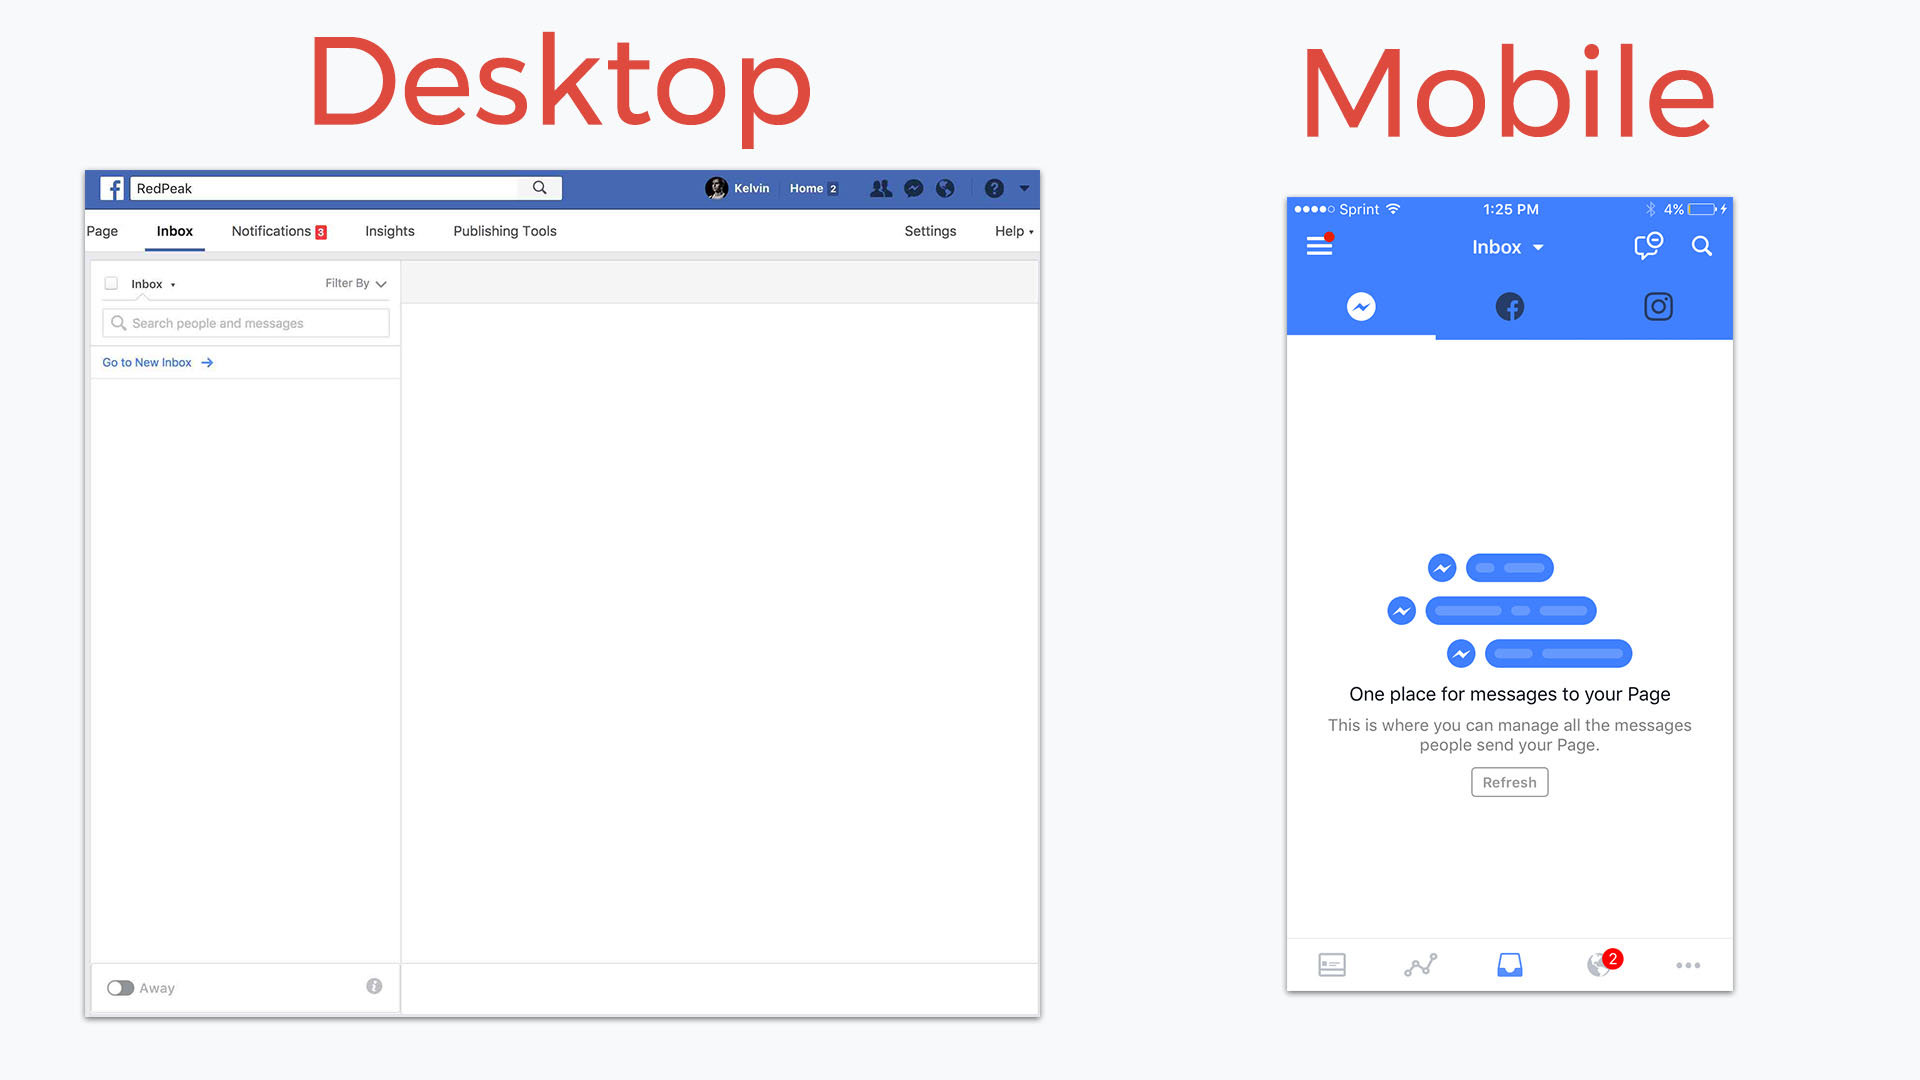
Inbox
If anyone is looking to reach out to your business on Facebook they will do it by sending you a message via your business page.
These messages do not go to the same inbox where you read your personal Facebook messages.
Instead, they’ll have their own dedicated inbox.
If you’d like to access and respond to these messages on your phone you can do so through Facebooks Pages Manager App.
Notifications
Here’s where you can keep track of all activity that involves your content.
Every like, comment and share what happens on both your Facebook ads and your organic posts will be displayed here.
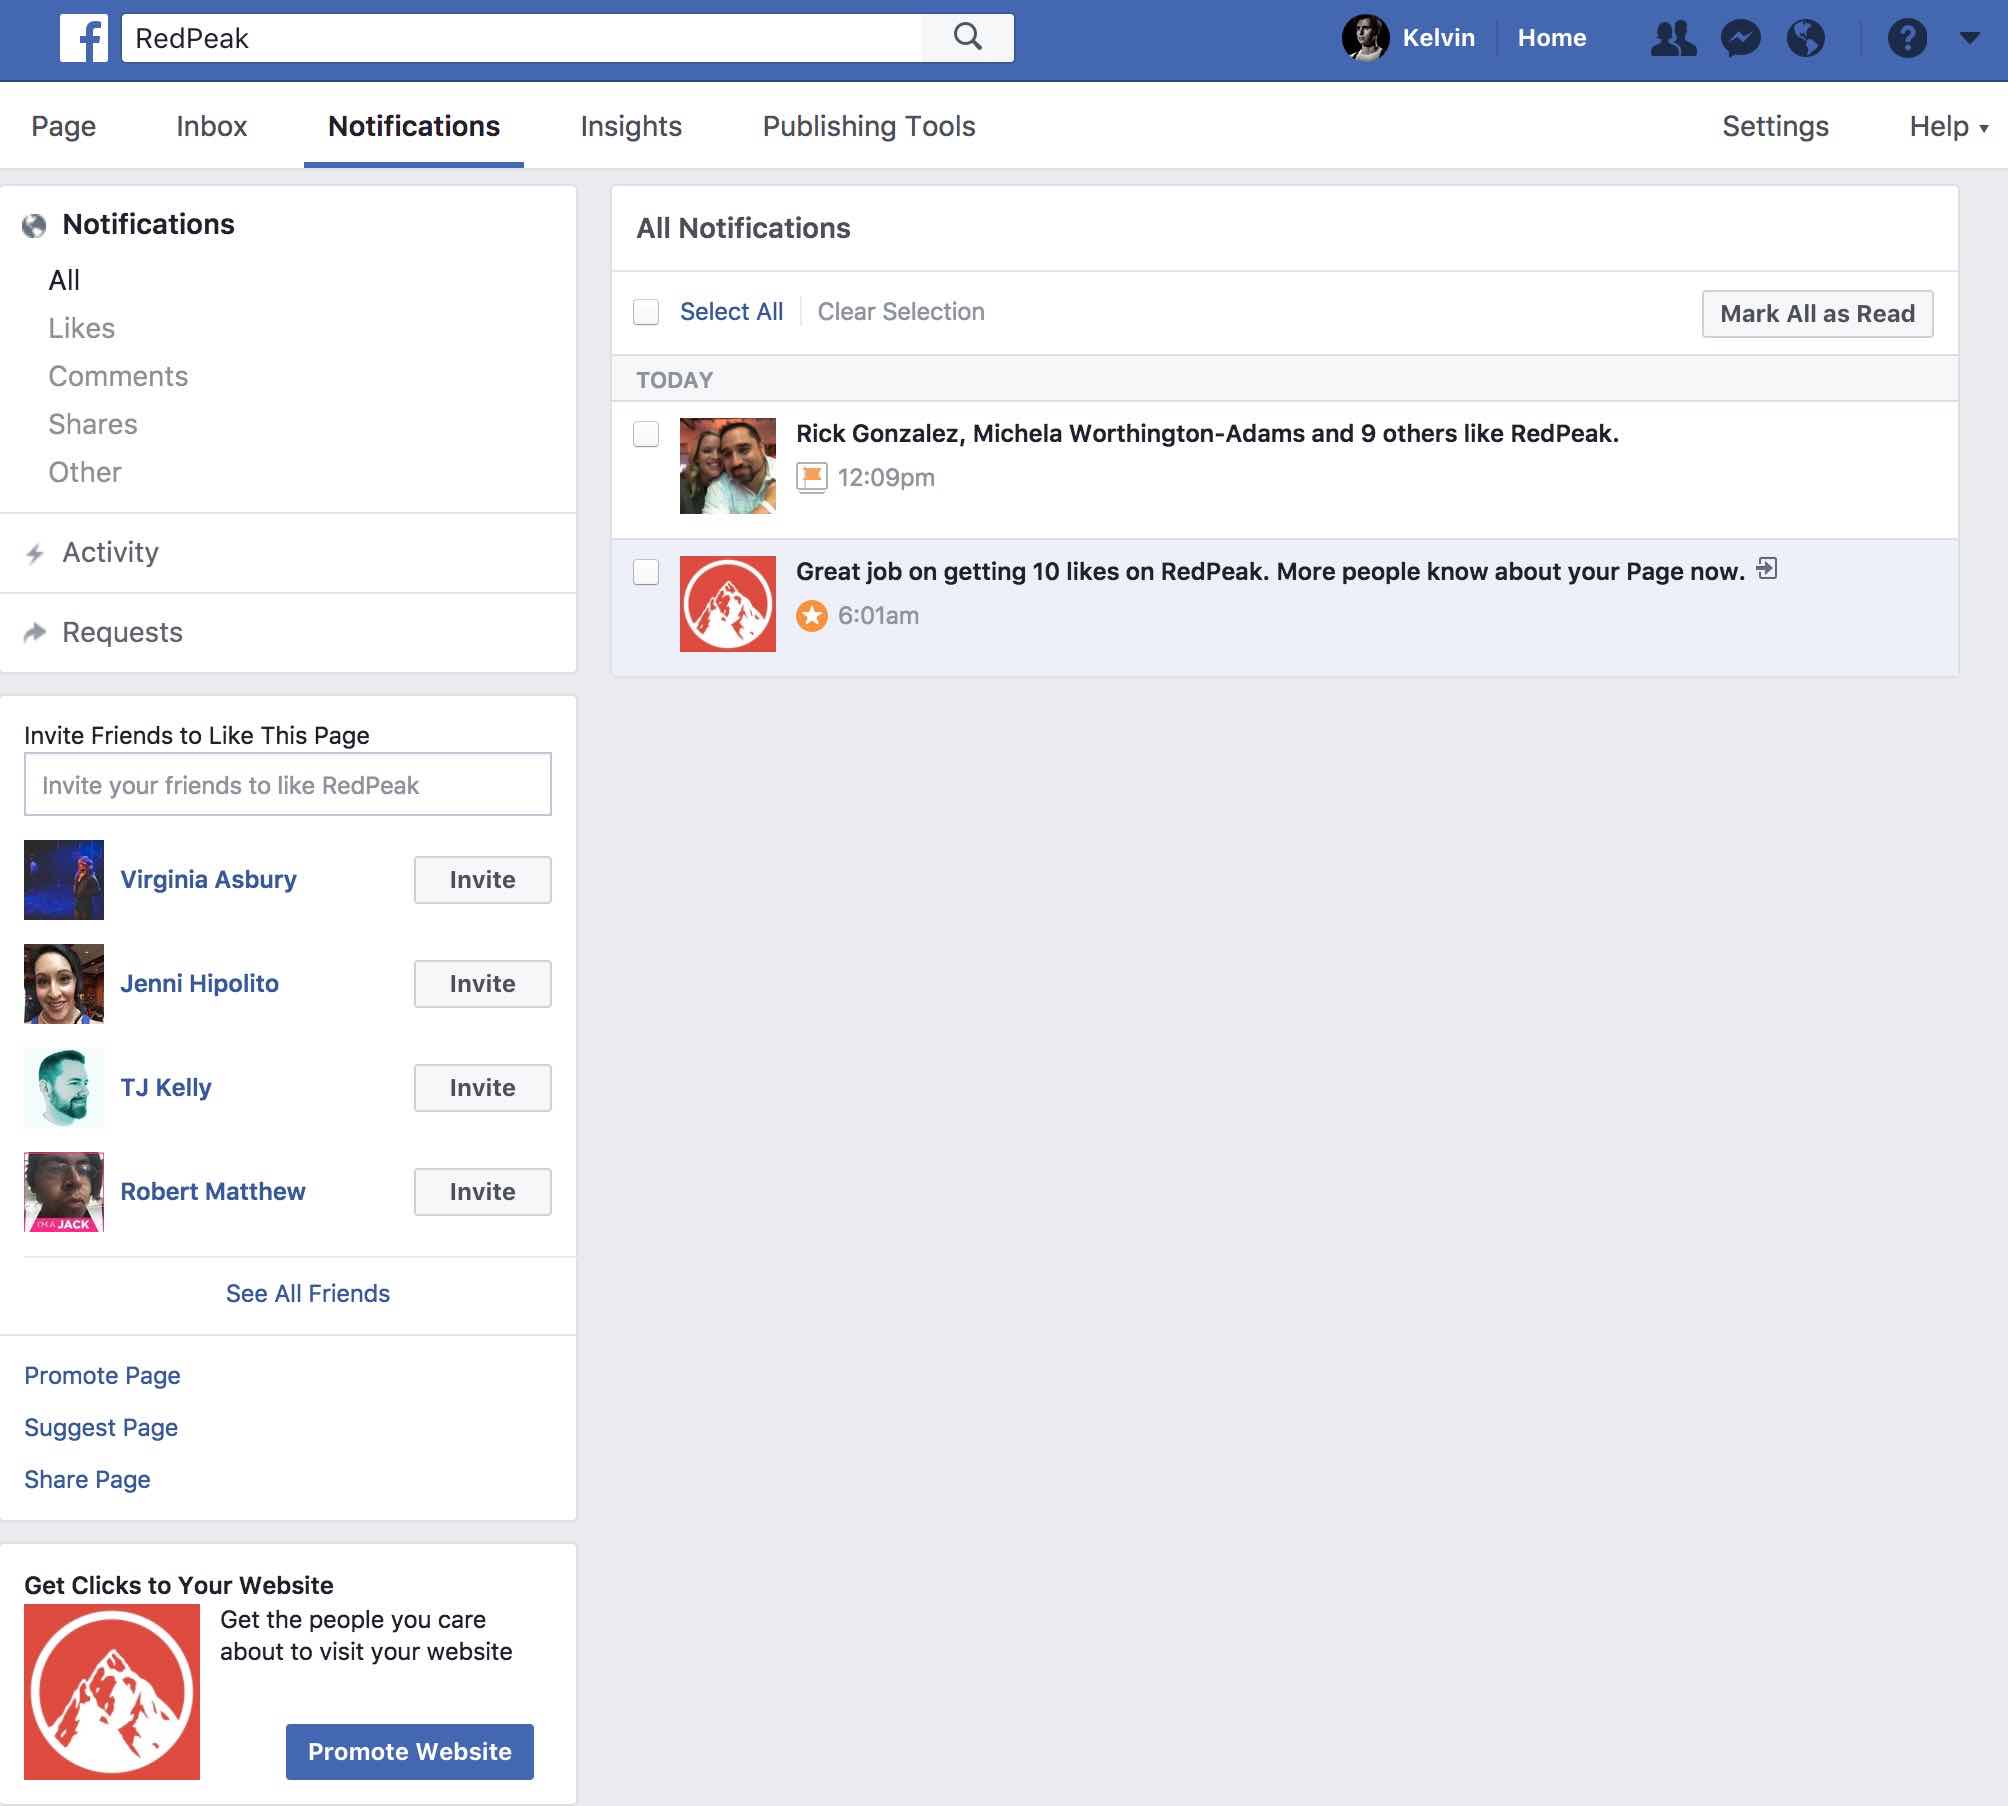
Thanks for the like Rick!
What’s the best practice for managing these notifications? If you’re just starting out I would highly advise that you take the time to acknowledge each comment that comes your way. I’ve worked with plenty of businesses that are extremely dedicated when it comes to responding to potential customers. It really does pay off when you’re trying to establish a presence.
Insights
I’m an analytics guy so this is easily one of my favorite sections on the Facebook business page. This is where you collect all the most important data (reach, impressions, views, times). This data can help you make fundamental decisions on the type of content you should post when you should post it, and who you should be aiming to reach.
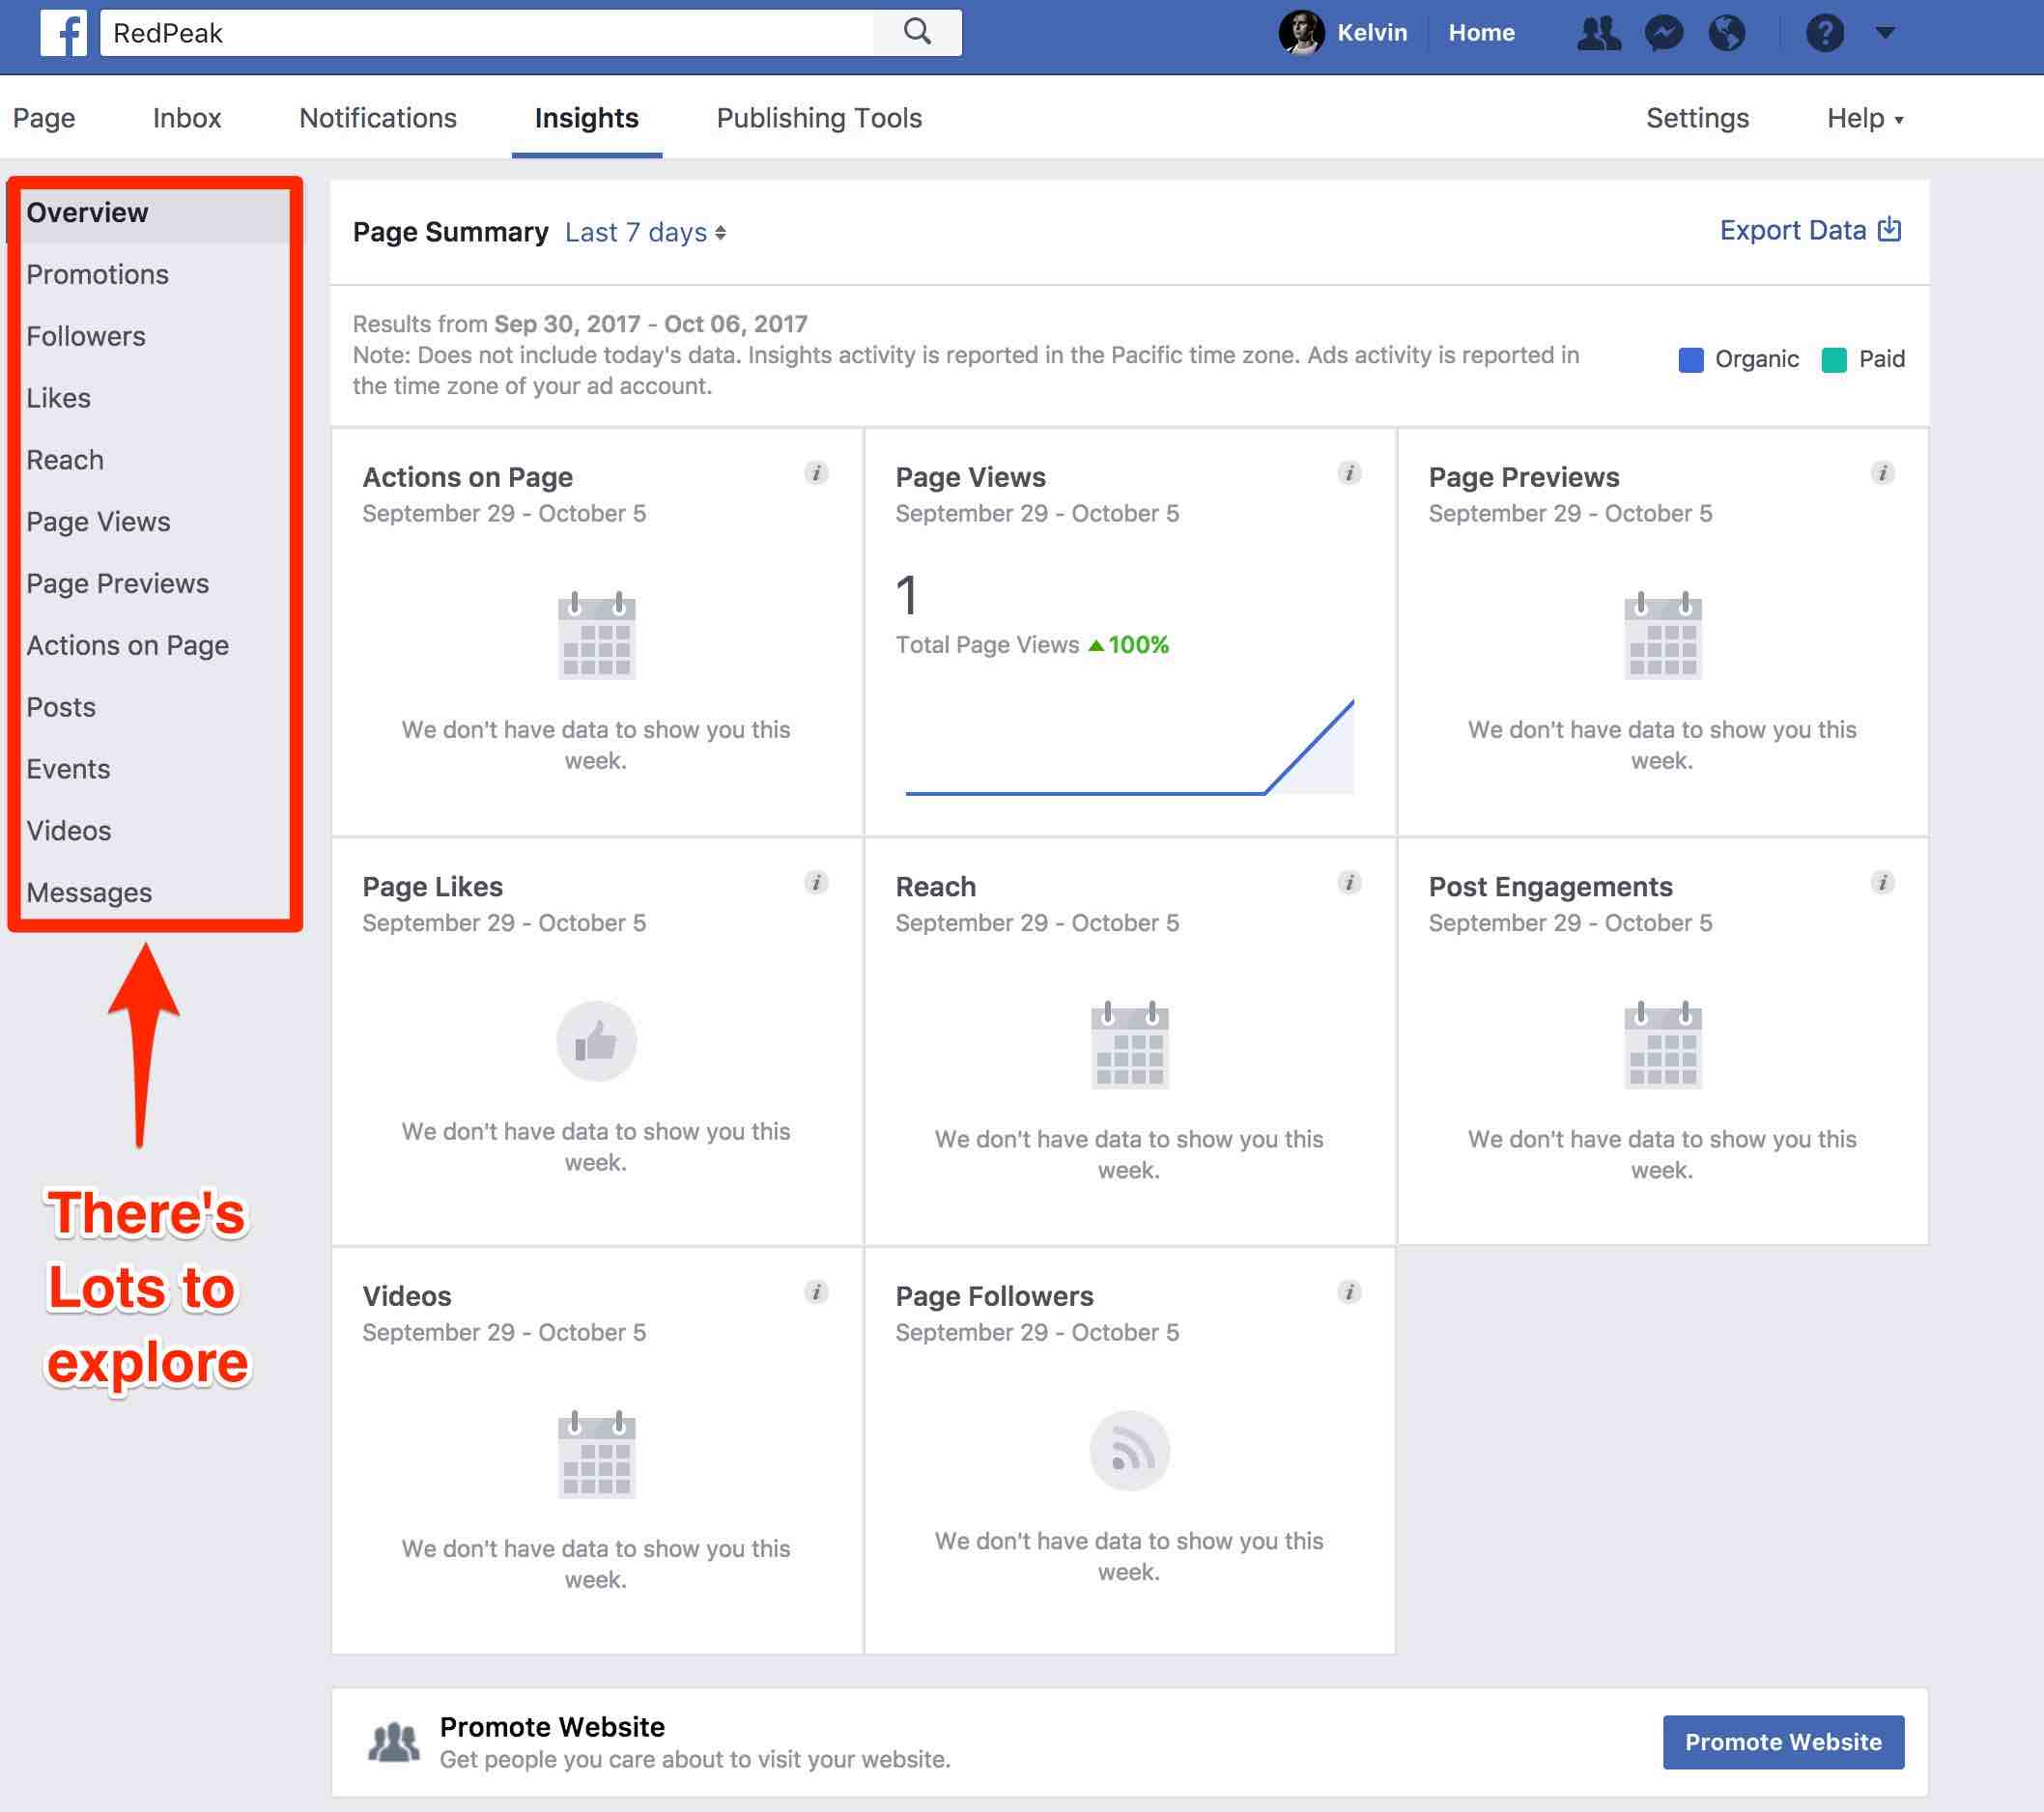
You can see on the left-hand side of your screen you have a number of different options to explore.
Combing through data can be tedious and time-consuming but it can often yield some of the most important decisions you could ever make as a small business owner.
Insights are also available on the mobile app so you never have an excuse to not check your stats!
Publishing Tools
The final tab we’re going to take a look at is the “Publishing Tools” tab. Very similar to the insights tab you’ll have a number of different sections to explore on the left-hand side of your screen. I don’t particularly use any of these that often except for the “Scheduled Posts” section. I’m very consistent when it comes to scheduling my week of content since it can save you so much time.
We’ll talk more about scheduling content in the future but for right now feel free to browse these different sections so you’re acquainted with where everything is.

Step 4 – Publishing Your First Post
Now the final step before inviting people to like our page is putting up a piece of content for them to engage with. So we’re going to create our very first post and publish it to our timeline. To do this successfully we’re going to double check a few things to make sure everything is formatted correctly.
Simple things like formatting can dramatically separate you from your competitors. If you skip proper formatting or don’t give much attention to it, it’s laziness pure and simple. Now I’m going to make a few assumptions in this example, basically that you have a WordPress based site. If that’s not true then please feel free to email me [email protected] and I’ll see if I can help you get your post setup correctly.
Once you have your post written and titled you’ll want to set a featured image for the page. This will tell Facebook what you want them to display when you copy and paste the link over.
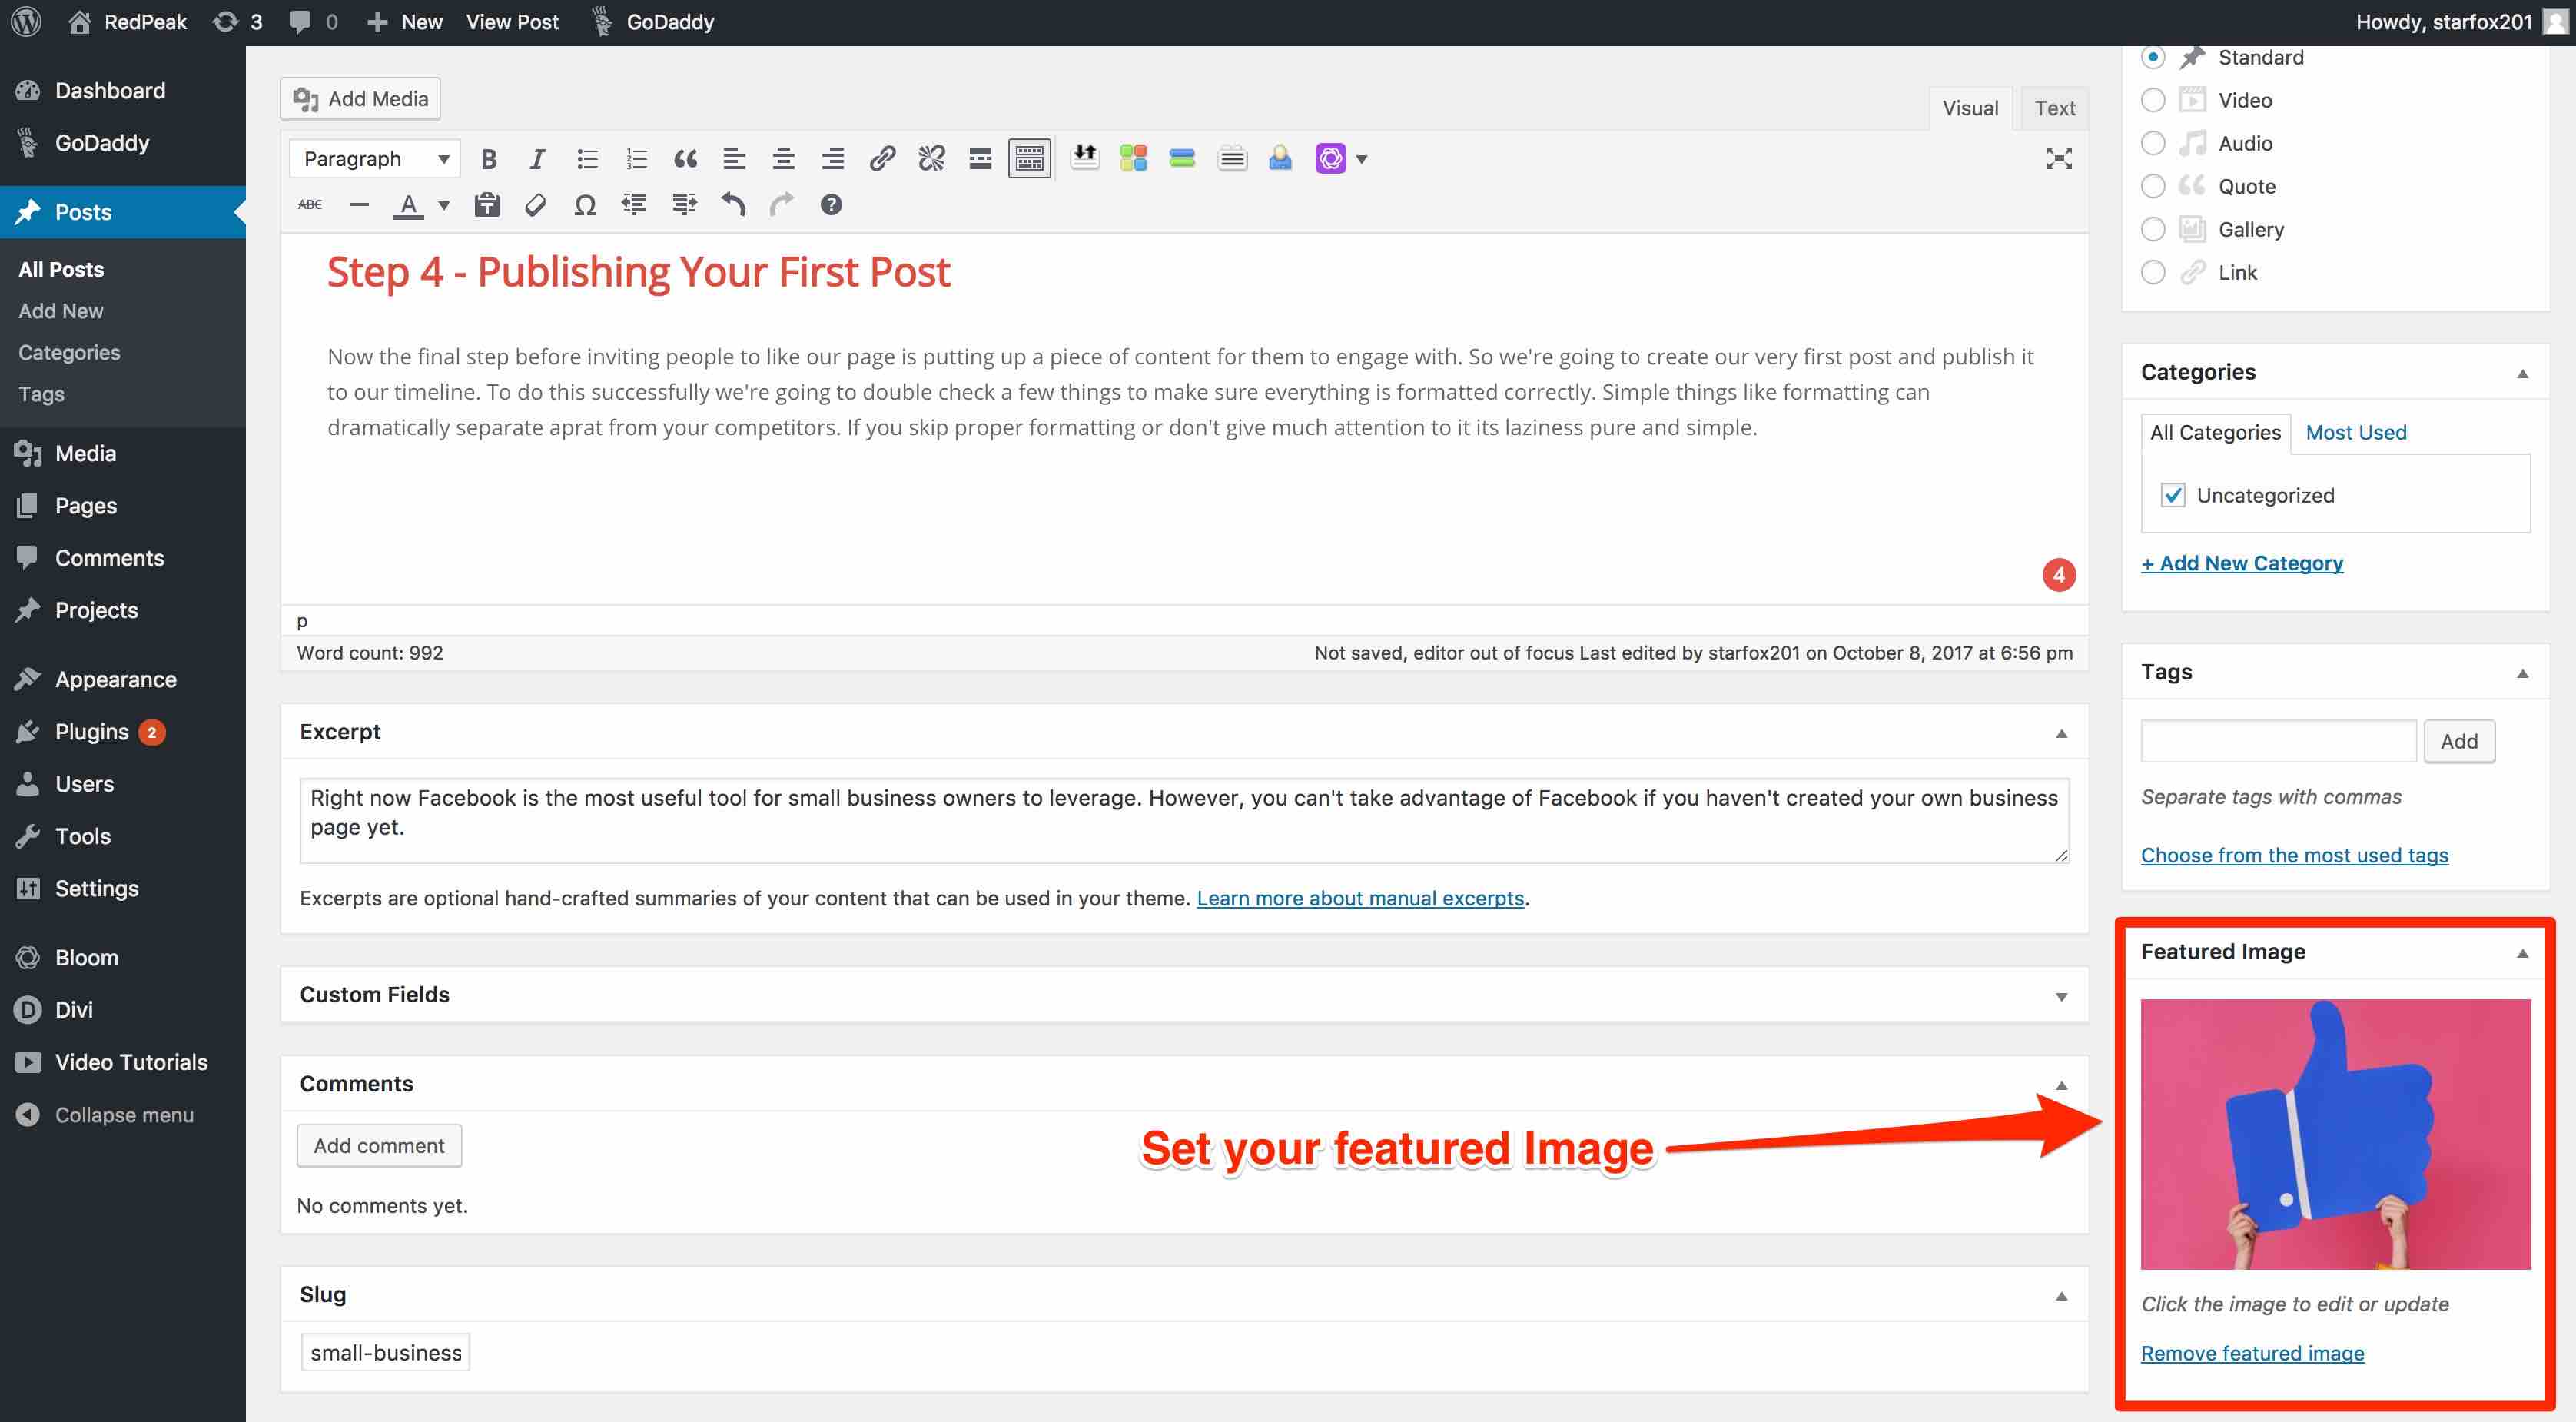
Again if you’re on WordPress that’s going to be on the bottom right-hand side of the screen.
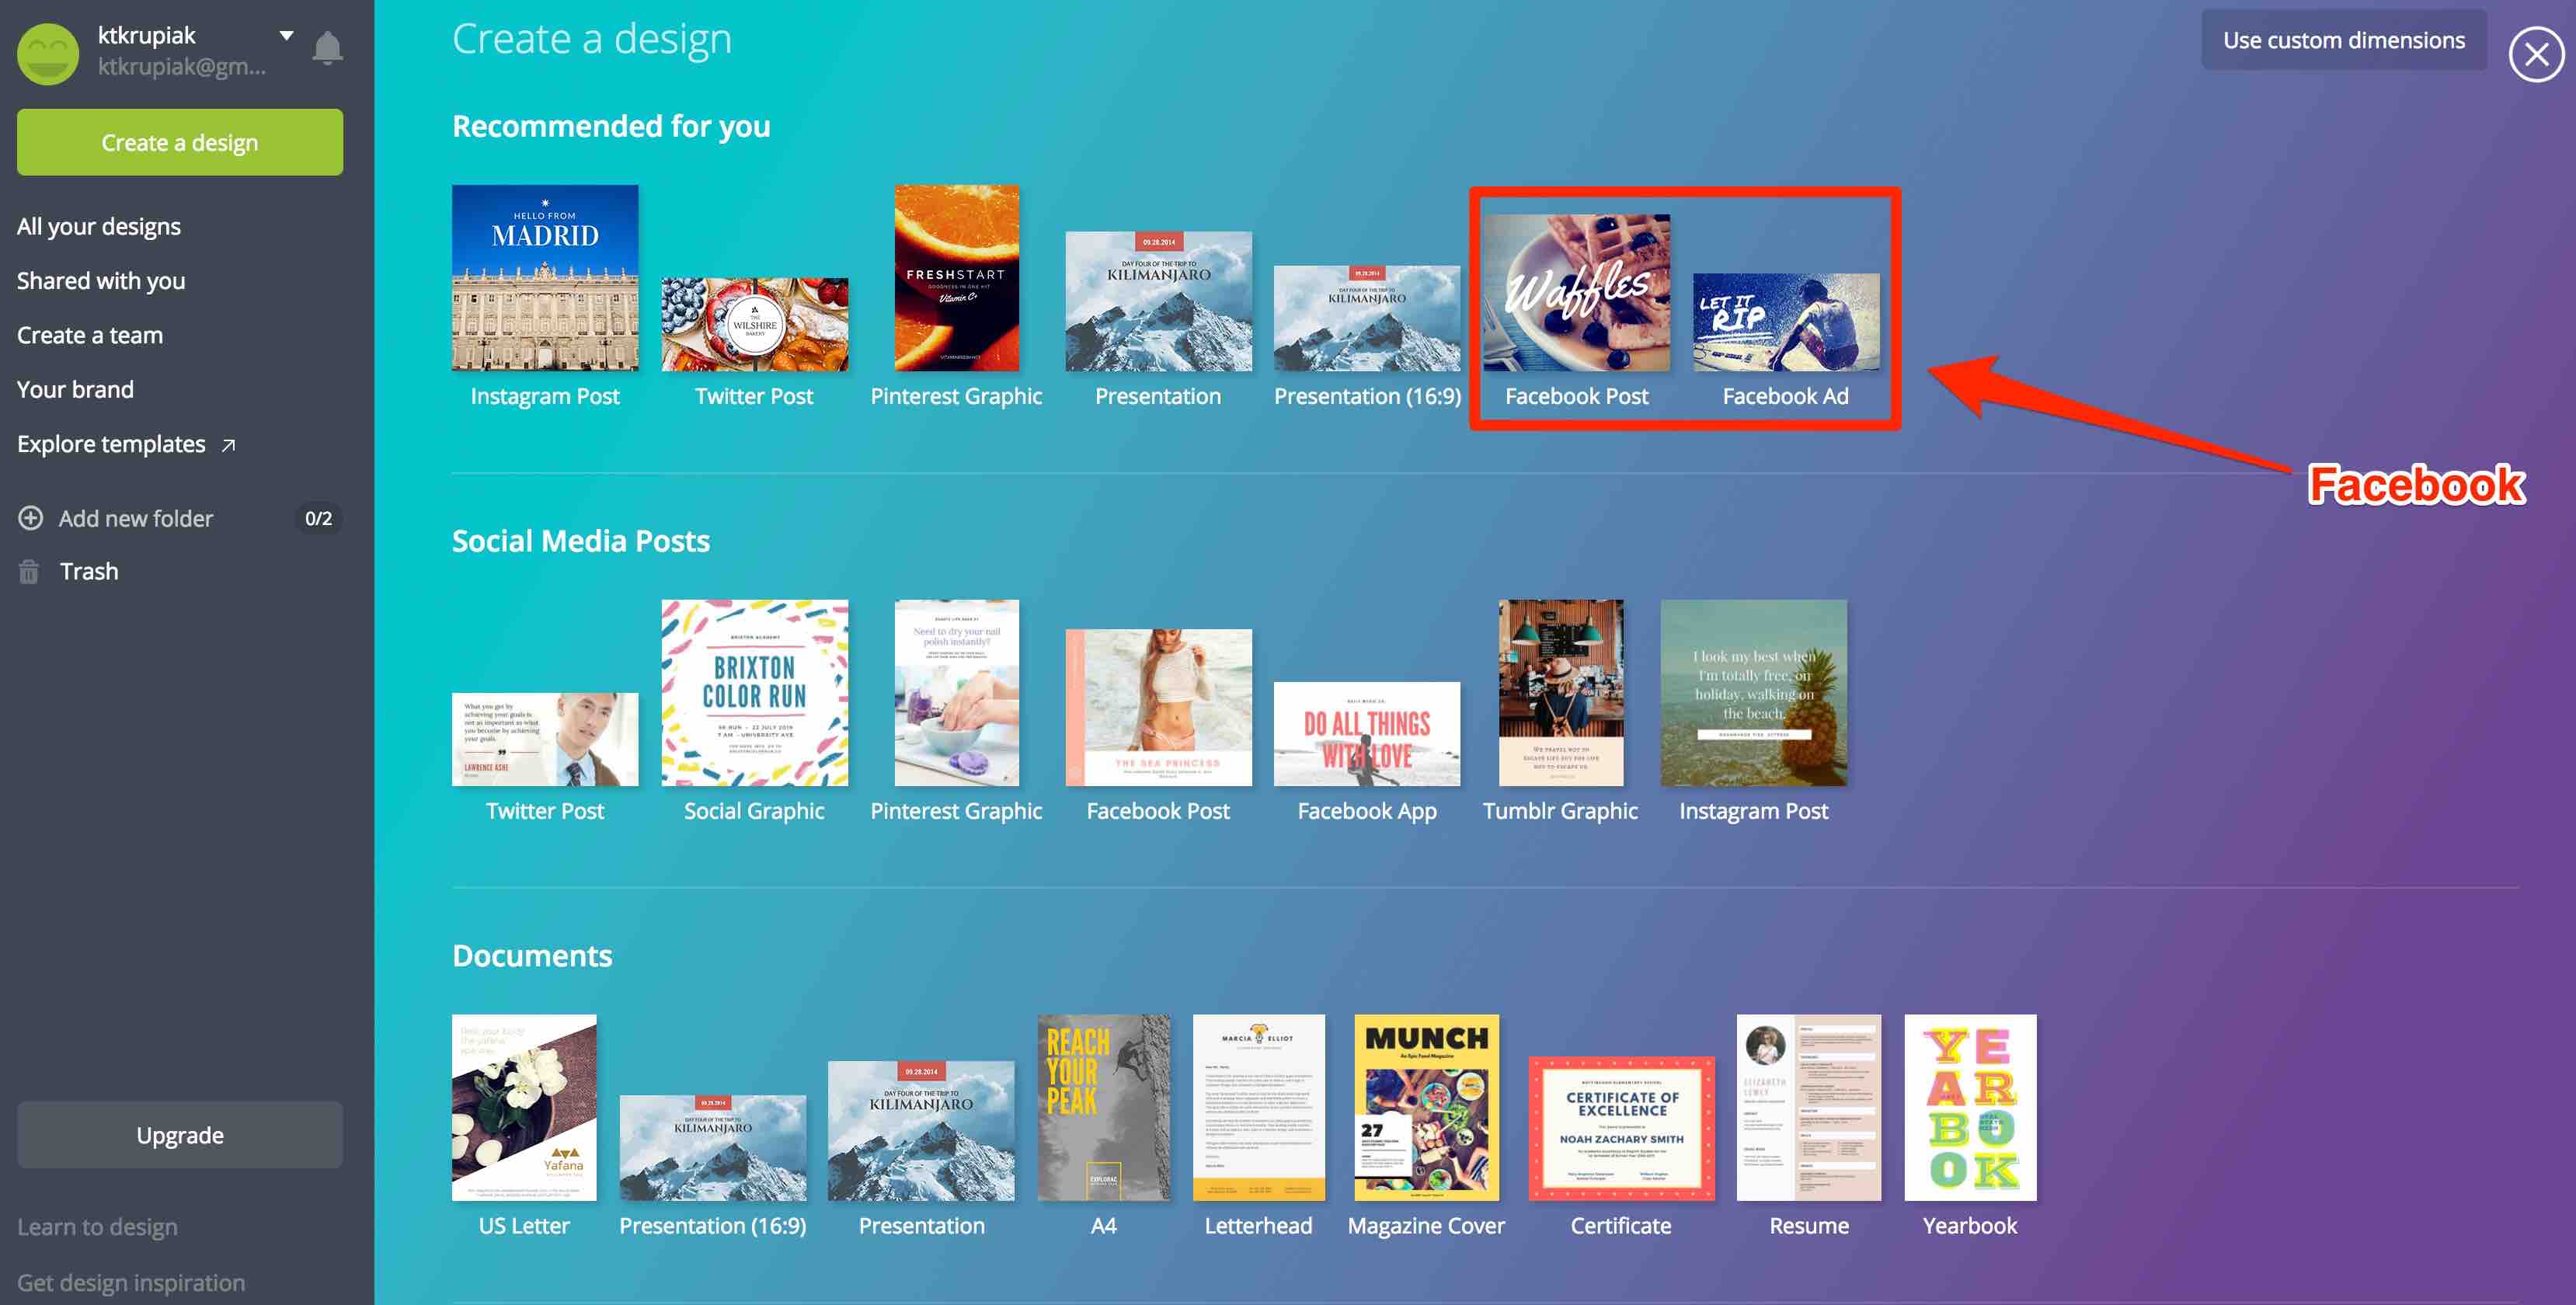
You can either upload the image directly from your desktop or from your media library. Also if you need help with formatting the image itself I would recommend using Canva.
Canva is completely free and has template sizes you can use to adjust your images.
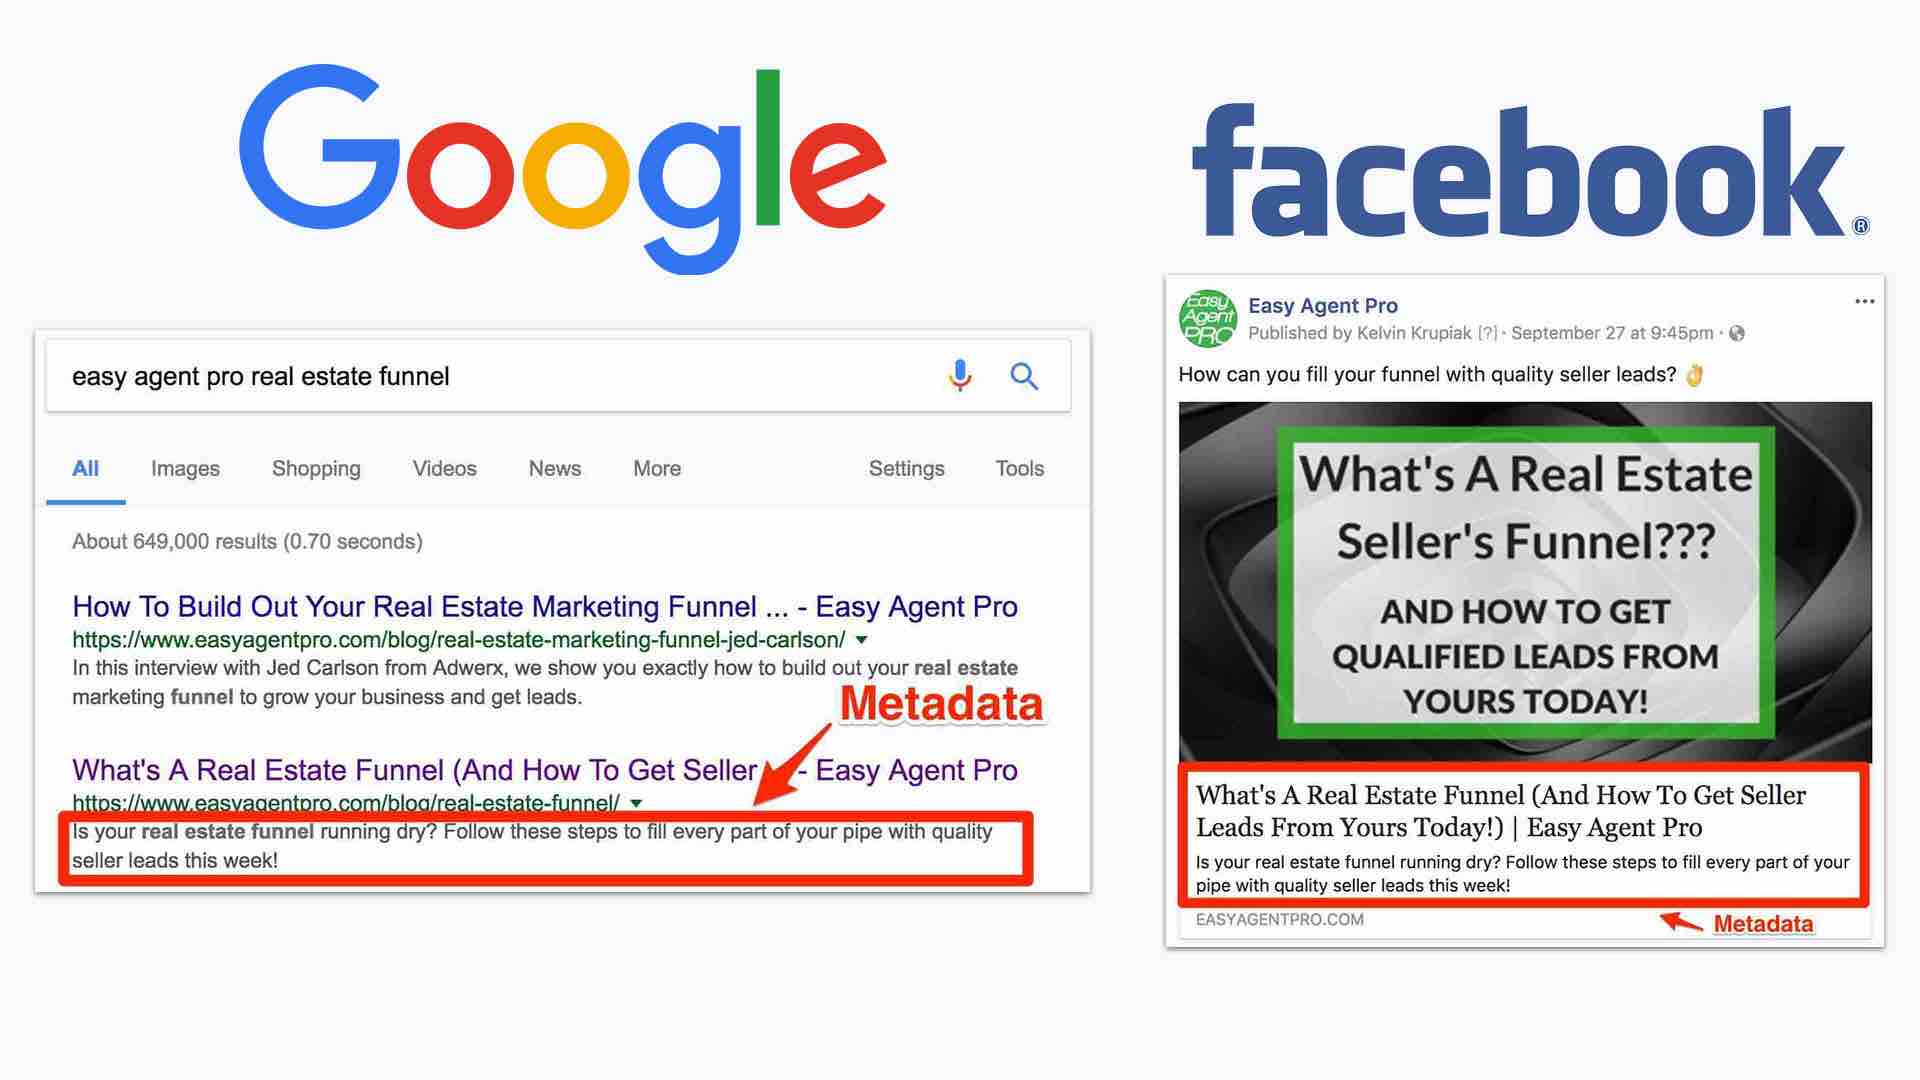
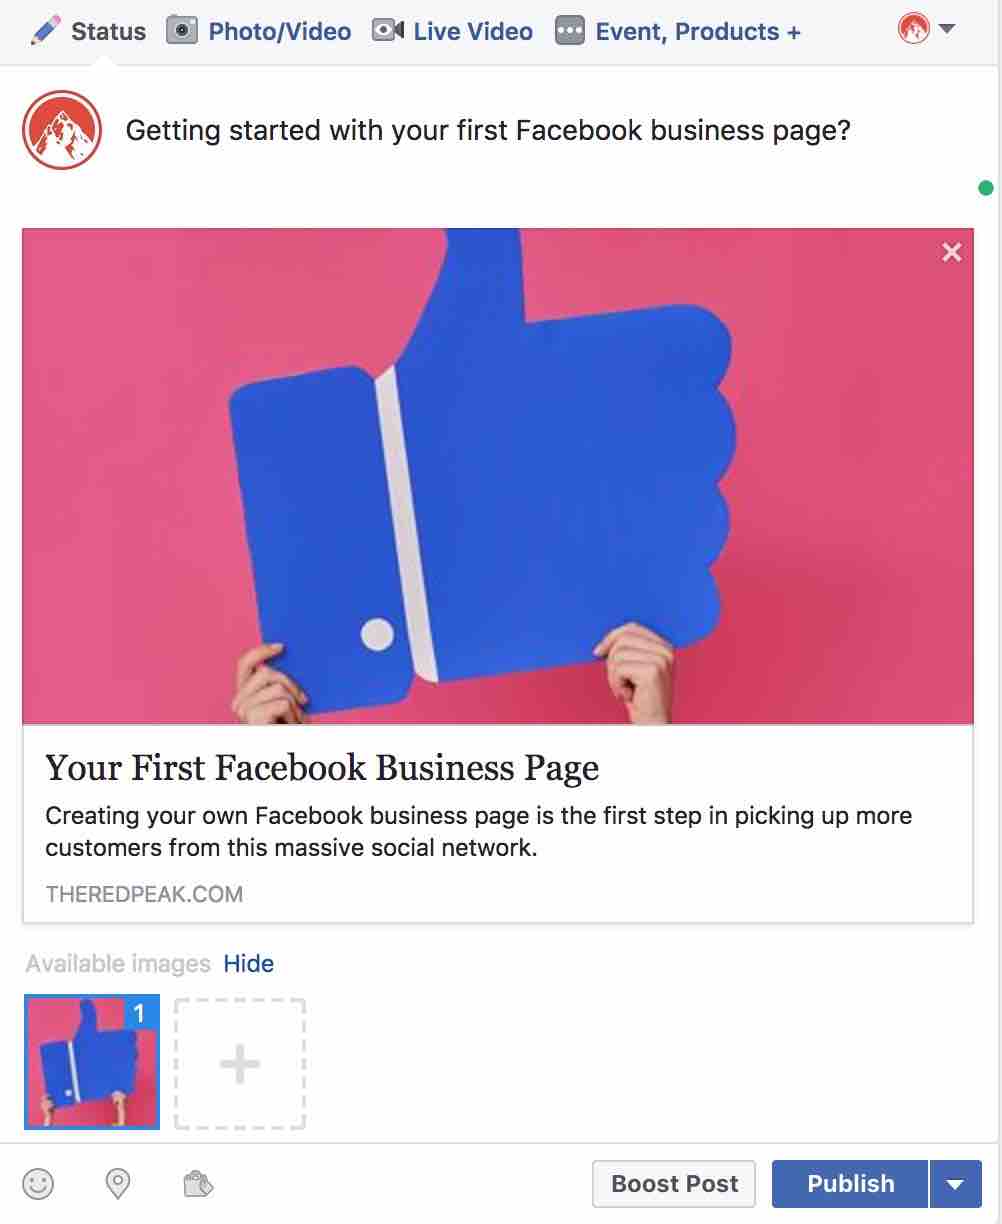
Now once you’ve taken care of your image make sure you take care of the “metadata” which is basically the small snippet of preview text below the image of a standard Facebook post.
Not only will this be displayed on Facebook but it will also be displayed on Google as well.
Here’s exactly where the metadata is displayed for both networks.
Now how exactly do we control this data?
I personally like to use Yoast which is a free plugin that helps me manipulate the display exactly how I want.
Once you install the free plugin if you scroll to the bottom of your page you’ll see this section.
SEO is a talk for another day so for right now just put the information that makes the most sense in the “Seo Title” and “Meta Description” sections.

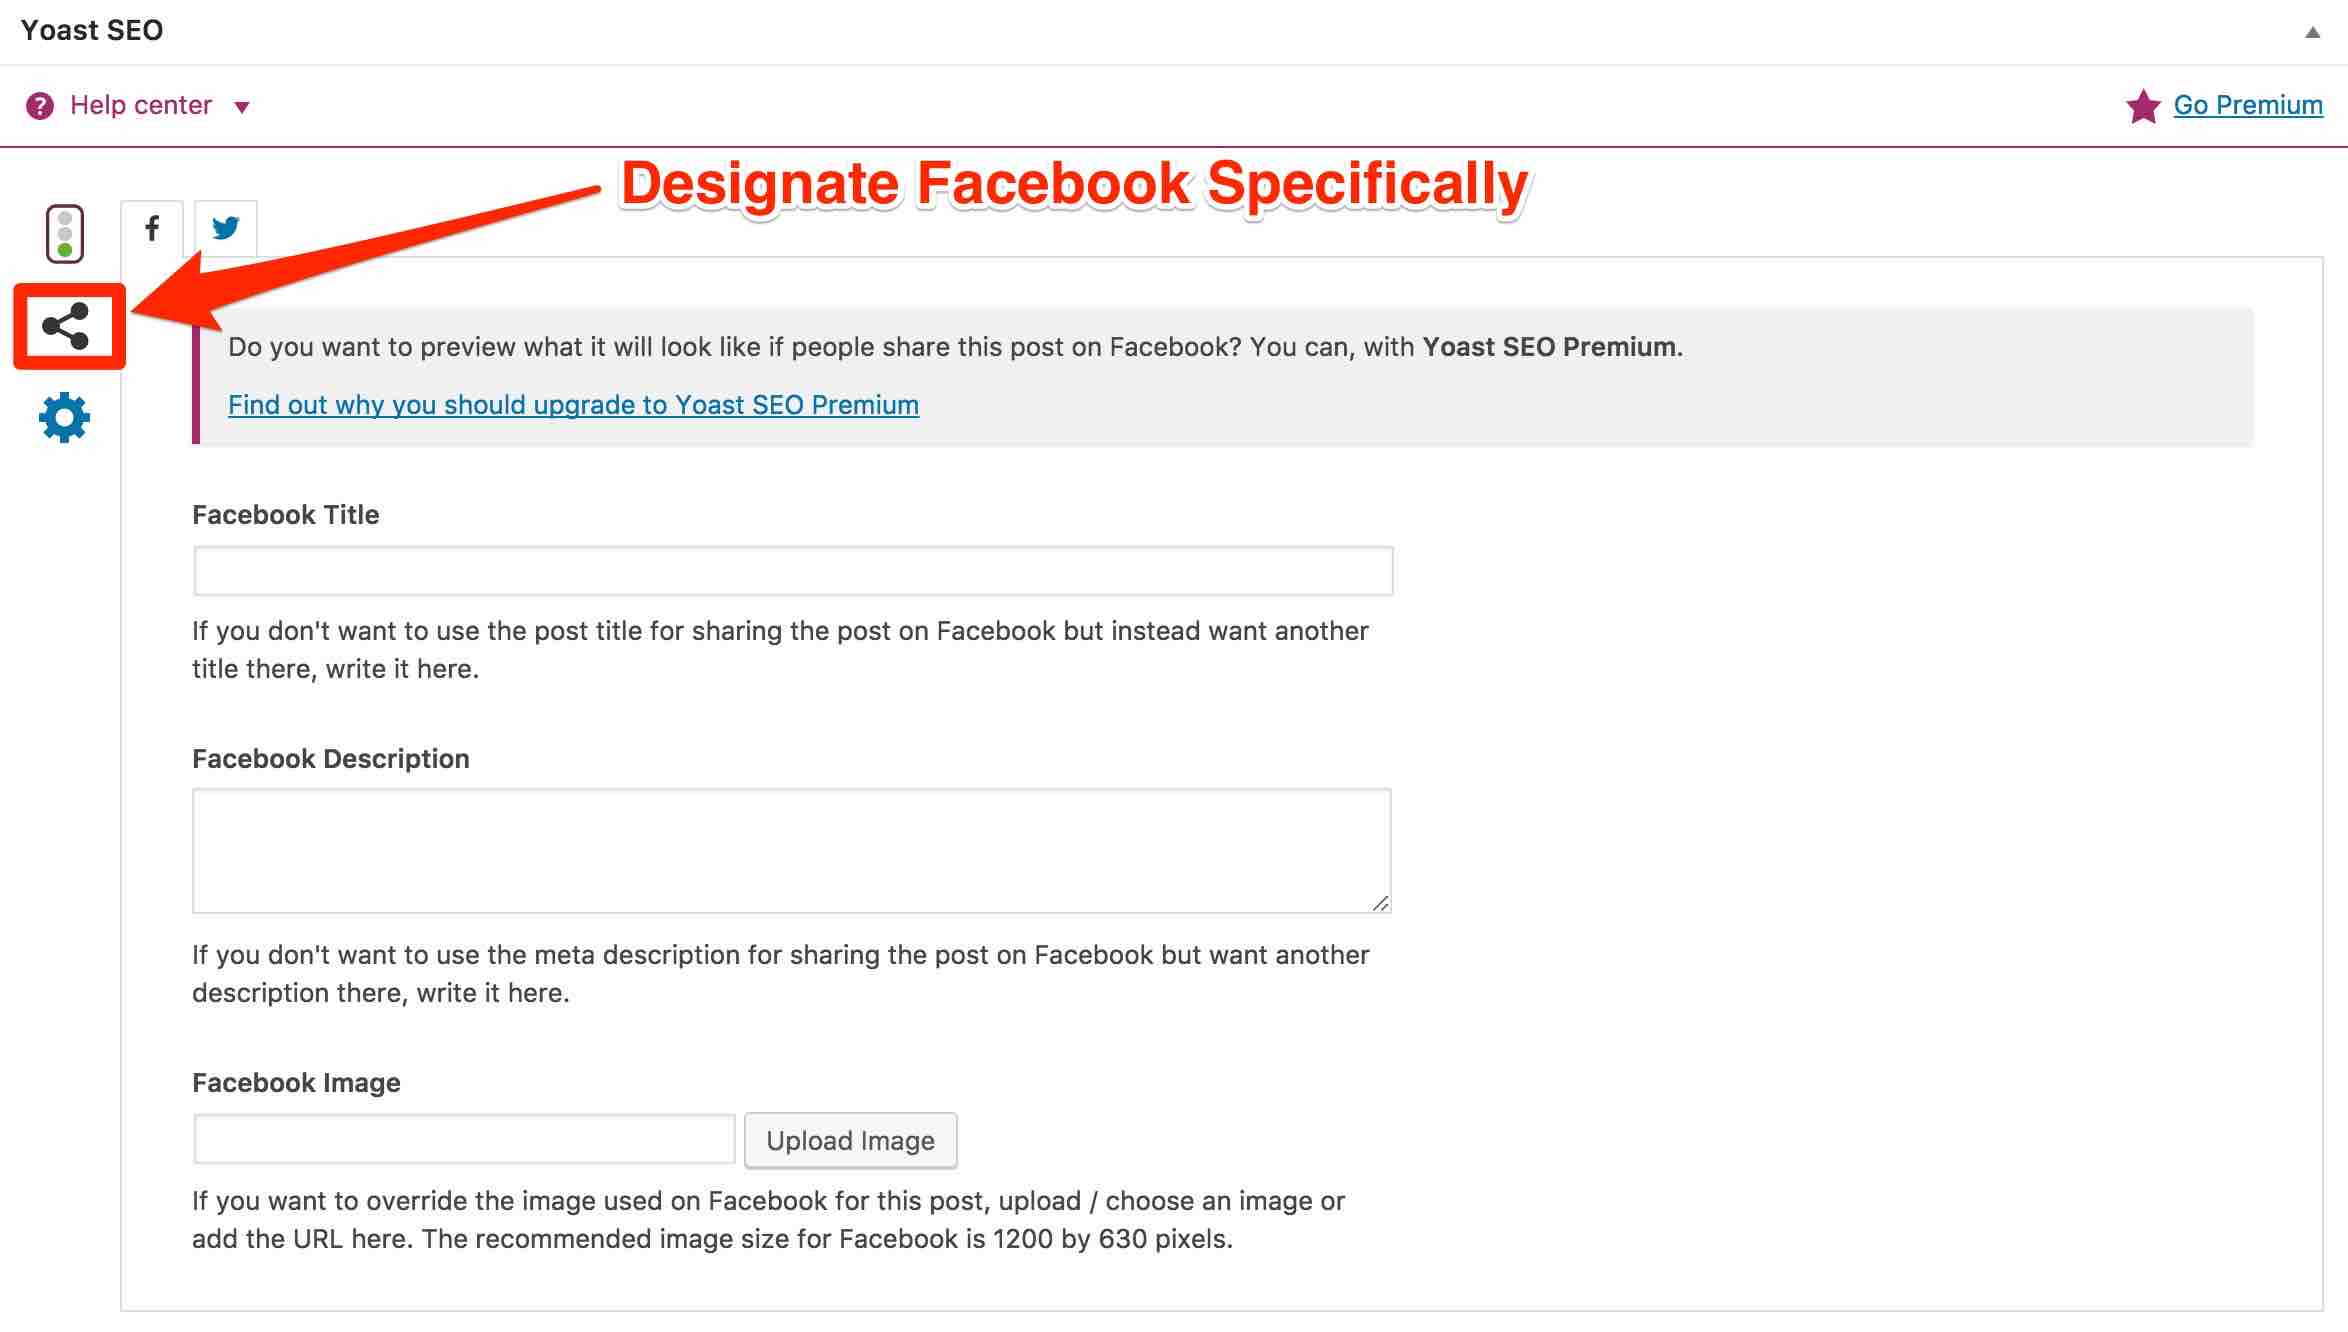
Now if you want to get as specific as possible you can select the social share icon that’s just under the stop light.
From there you can designate your headline and newsfeed link description specifically for Facebook.
Once you’ve formatted everything how you like let’s go ahead and preview what our post will look like.
There we have it! Congratulations on creating your very first Facebook business page post!
Now that we’ve created our Facebook business page and published out very first post its time to give our page a little boost.
Step 5 – Inviting Your Friends
This 5th and final step is not mandatory by any means but it can give you a little boost in initial momentum.
You’ll see on the right-hand side of your screen Facebook is giving you the option of inviting friends to like your page.
Now, I’ve known plenty of business owners who have anywhere from 200-1000 friends on their personal profile.
If that’s you GREAT if not DON’T STRESS!
What I’ve done in the past is actually declare my invites on my personal profile.
Meaning I make a personal post that goes something like this……

I personally just feel you owe your friends the courtesy of a heads up before spamming them all with invites.
There you have it, everyone, I hope you found this blog helpful in some way! If you have any questions about anything on here please don’t hesitate to reach out to me
directly I’m always available to help answer questions at [email protected]
Also the video above details everything in this post if you find you learn better through video.